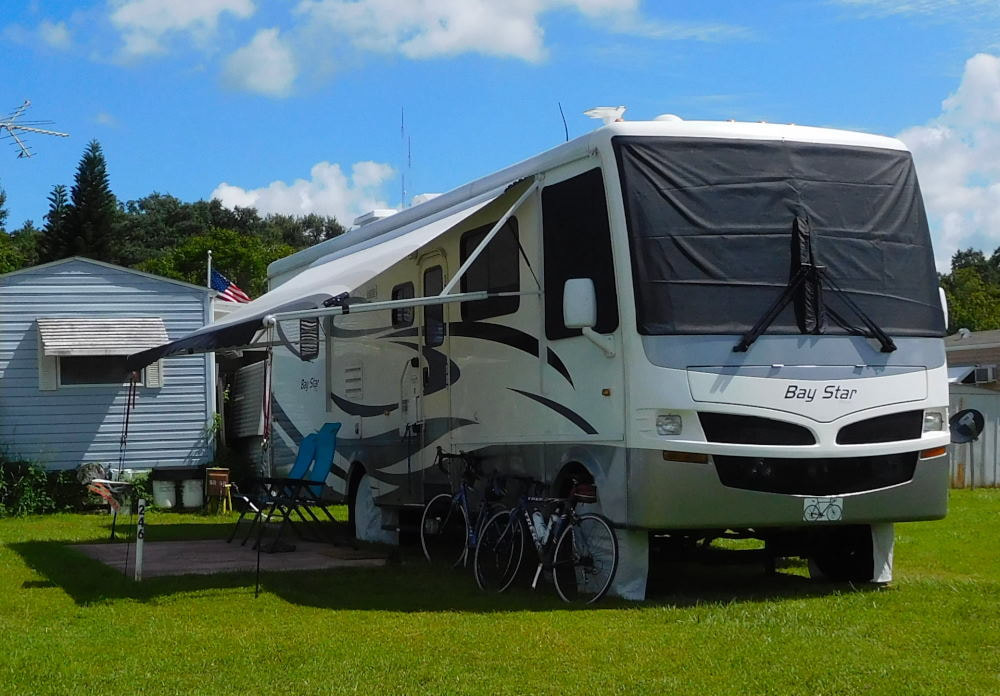
"Pearl" in Winter Garden, Florida
|
Long shadows in Wyoming
|
|
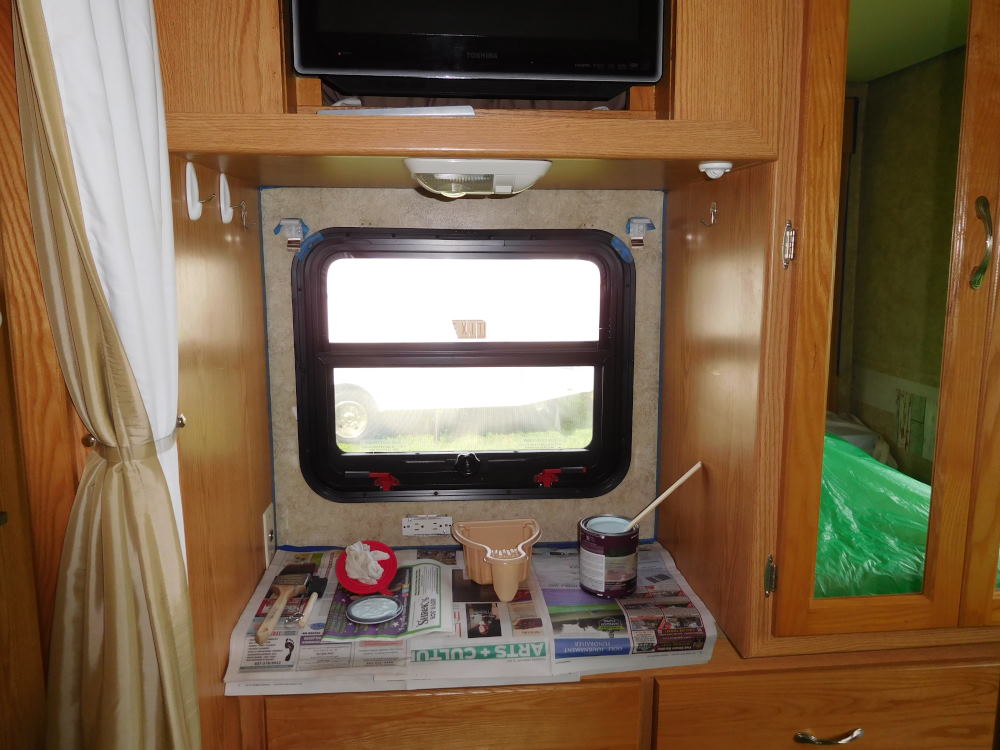
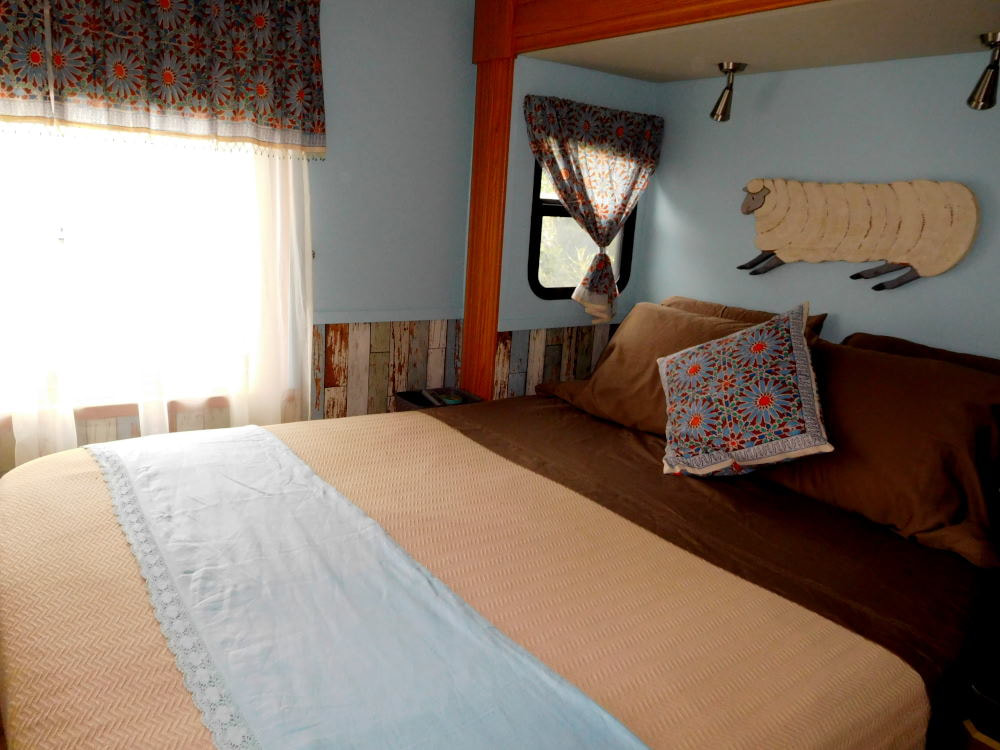
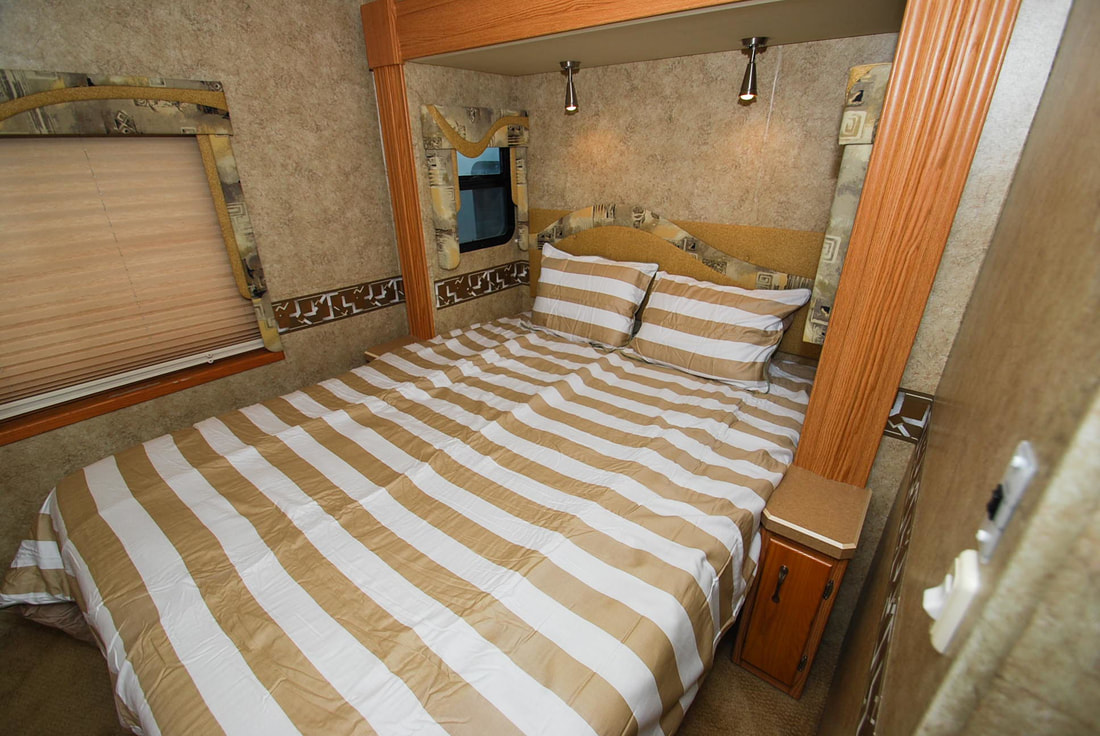
Since purchasing our motorhome, Pearl, in January 2016, we have completely redecorated her bedroom and wanted to share the transformation. It looks very different from where we started! Here's a photo from the dealership where we bought her. 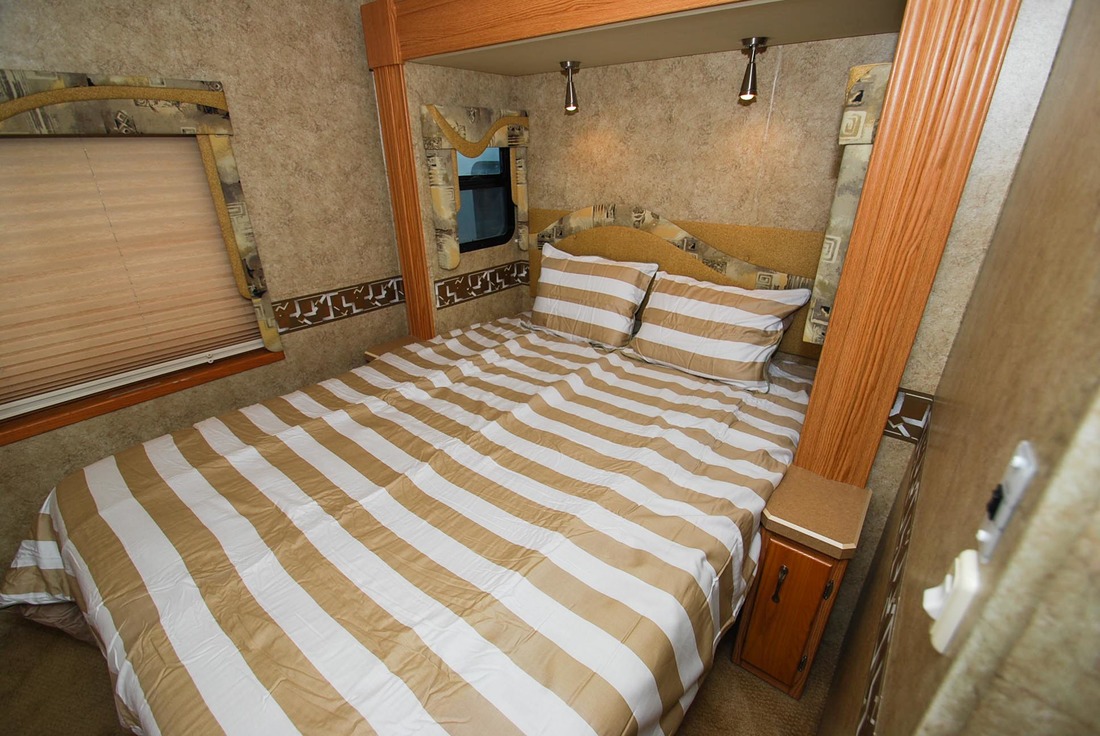 This was not a weekend project. We worked on it a little at a time for about a year. I actually had most of this post written in March, but we didn't put the final touches on until mid-summer, and it has taken me this long to get back to it. Life intervenes! Initially, we stripped down the bedroom to its essentials. The plug-ugly wallpaper border was the first thing to go, followed by the heavy and unattractive wooden valances and headboard. We also replaced the sliding accordion door with a curtain for when we want to close off the room completely. Months later, we got around to replacing the stock day/night shades (which let in far too much light even in night mode) with blackout cellular shades in a dark mocha color. They aren't especially attractive but do a great job keeping unwanted light out at night. RV parks can be far too light at night (for security), so it's important to have really good window coverings if you want a dark room for sleeping. We do. Here is what the bedroom looked like all stripped down. Boring, right? But I had big plans ahead. 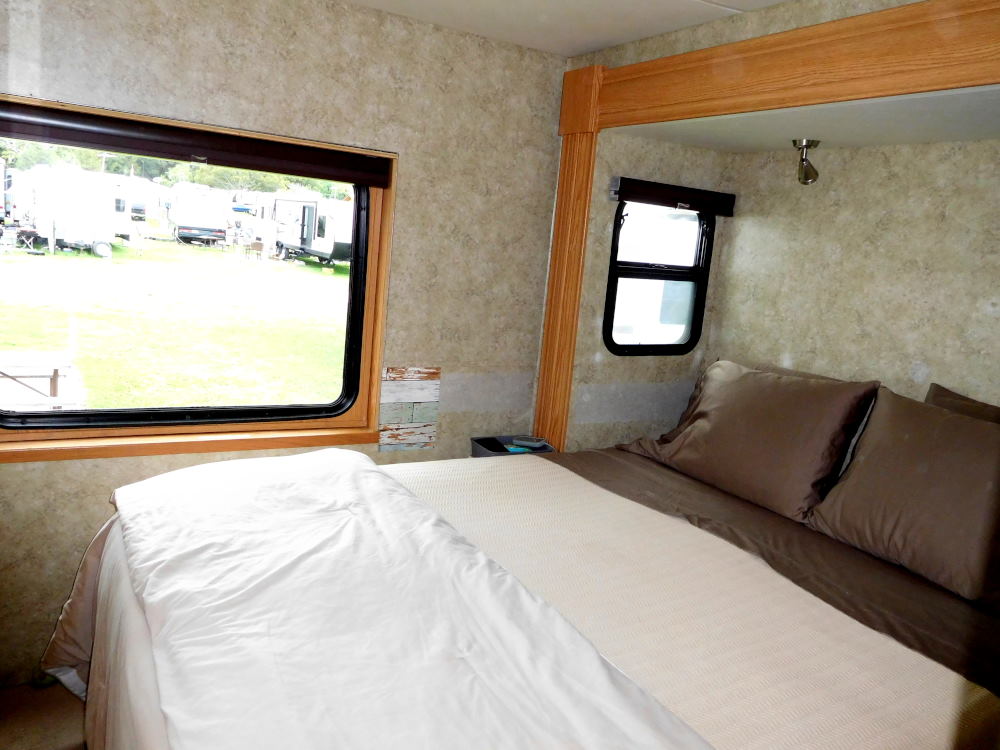 First up this past winter was painting. I planned to put peel-and-stick wallpaper up on the lower half-walls, so I only had to paint the upper part of the walls. I used Behr Premium Plus Ultimate paint (available at Home Depot), which includes primer so saves the priming step. I chose the color "Malaysian Mist", a tranquil, calming shade of blue with a hint of green, perfect for the restful space I wanted our bedroom to be. As usual, the prep took longer than the actual painting. I had to patch some holes left from removing the valances and day/night shades. I then lightly sanded the walls, followed by TSP washing and rinsing. Then, there's the application of painter's tape, which always takes a long time but really helps me to get a good finished product with sharp edges. And pulling it off is so satisfying! On painting day I draped the bed with a large plastic drop cloth. I used a shower-curtain liner cut into strips as the drop cloth on the carpet, and it worked better than any drop cloth I've ever used. It lay flat, didn't bunch up, folded down small after use, and is perfectly sized for "tiny house" paint jobs. Highly recommended!
Here's how the room looked after painting. Better, but still very much unfinished. 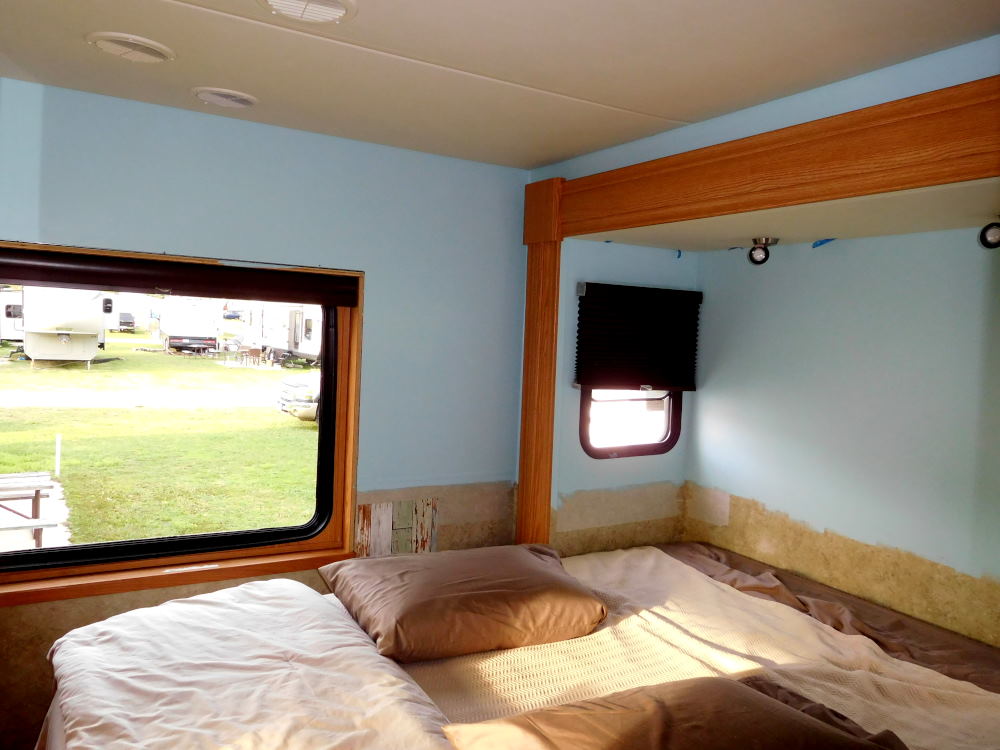 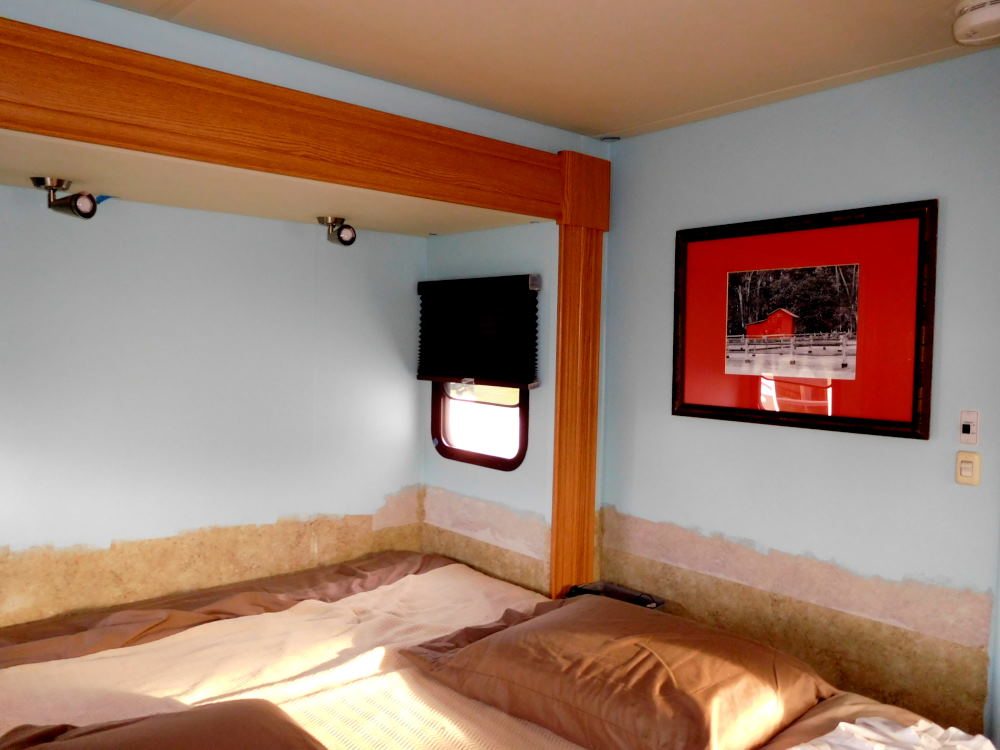 Next up was applying the peel-and-stick wallpaper. If you're not familiar with this product (I wasn't until I started researching online), it is the latest and easiest thing in wall covering. It is marketed especially for apartment dwellers since it is easy to peel right off without harming the wall surface underneath. I chose it because of the small space in the bedroom; I just couldn't see having to deal with standard wallpaper and all the water needed to apply it in such tight quarters. I chose NuWallpaper brand in the pattern "Old Salem". Some Home Depots carry the NuWallpaper line in the store, though only a few of the many patterns are available. Other patterns are available for online ordering at Amazon and Wayfair. Each roll is 20.5 inches wide and 18 feet long, and it can be applied vertically or horizontally. I had ordered sample pieces of several different patterns ahead of time; this photo shows the pattern I ultimately chose. I only needed one roll (and didn't even use it all) for this small space. 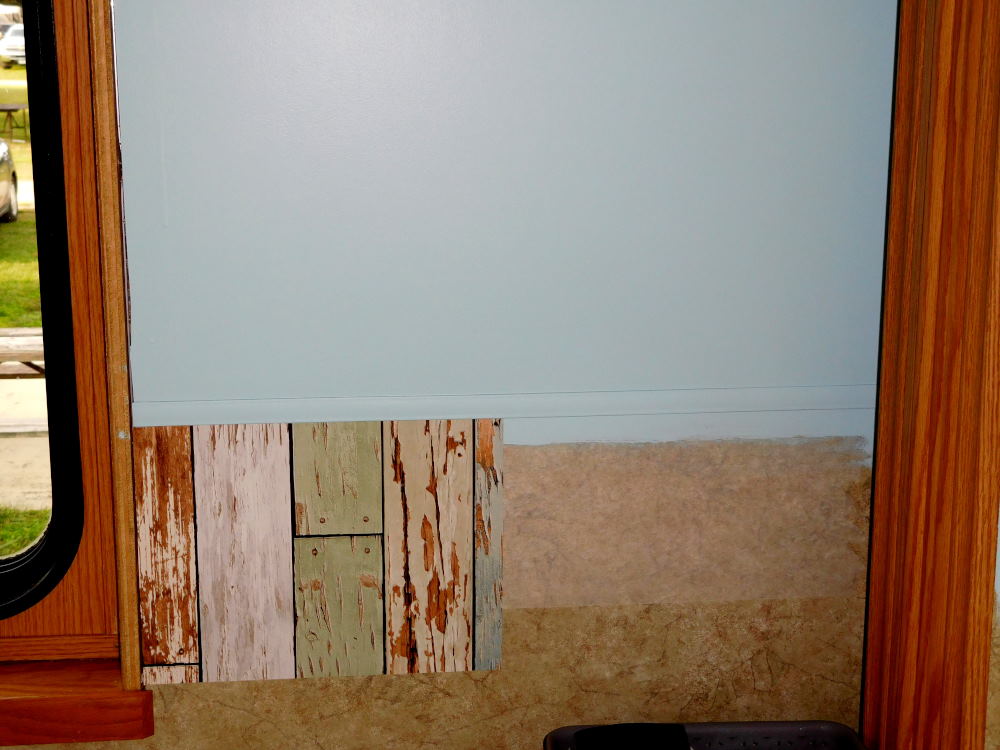 I installed the NuWallpaper horizontally so that the boards pattern would run vertically. If I'd installed it vertically, like traditional wallpaper, the boards would have run horizontally. Either way is fine; it's really just a matter of personal preference. I figured applying it horizontally would mean fewer cuts, which it did, but it also made for longer pieces that were a bit more unwieldy to apply. In a larger room, I might have gone the other way, as the longer pieces would have definitely required a helper to avoid tearing. One nice thing about this wallpaper is that if you don't get the placement of a piece exactly right the first time, you can carefully pull it off and try again. This was really not a bad project (much easier than painting), and I was done in just a few short hours. You'll need a measuring tape, dedicated table, scissors, utility knife with a fresh blade, and long straight-edge for cutting, and a wallpaper smoother for smoothing it on the walls. I didn't even have to bug Barry to help -- a good thing given the small quarters I was working in! 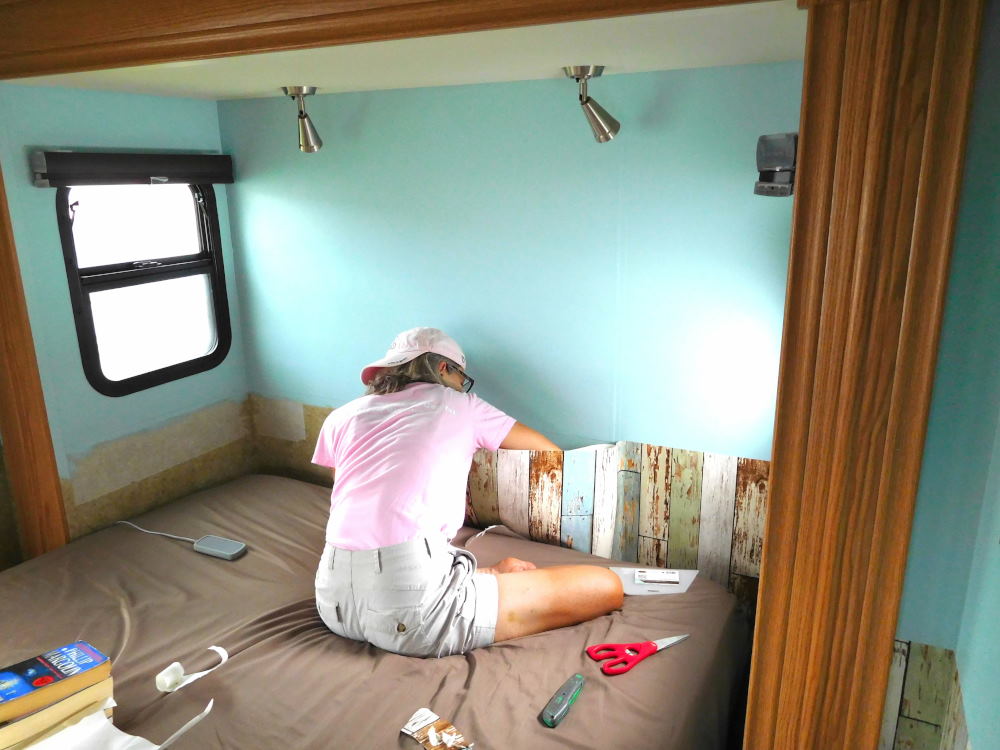 Here's what the finished product looks like from the hall... 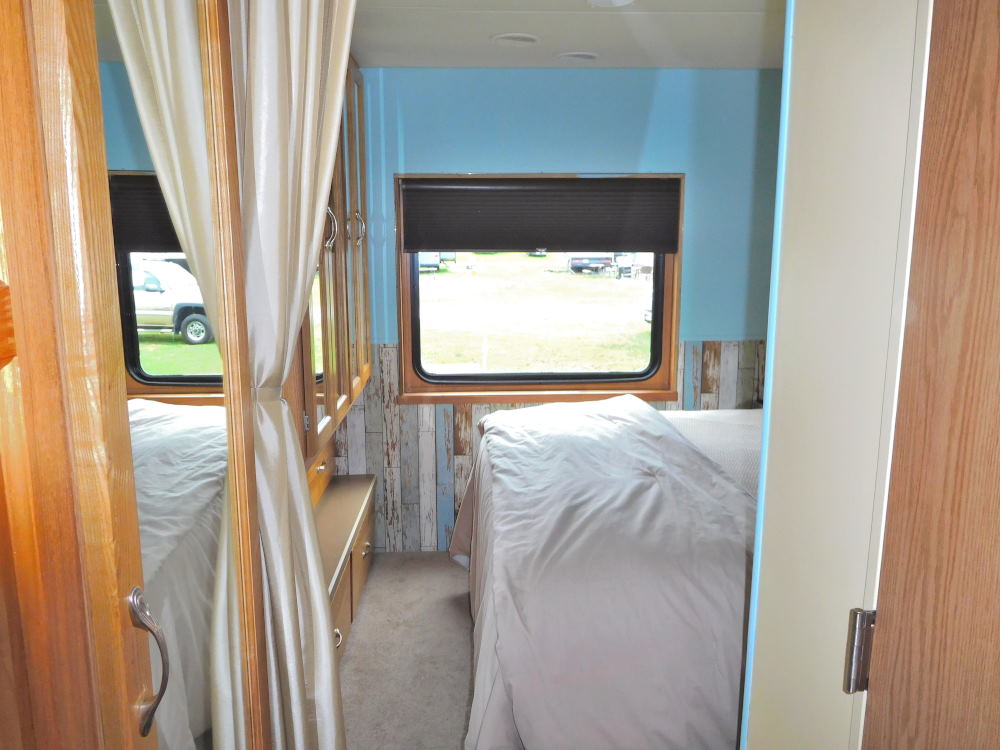 ...and inside the bedroom. 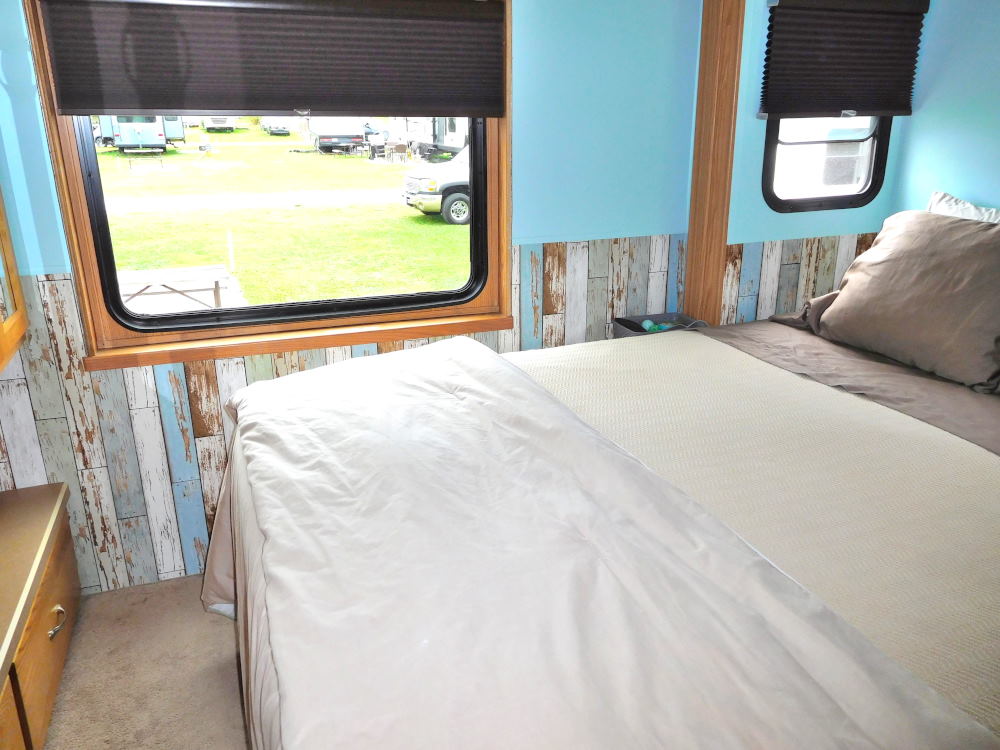 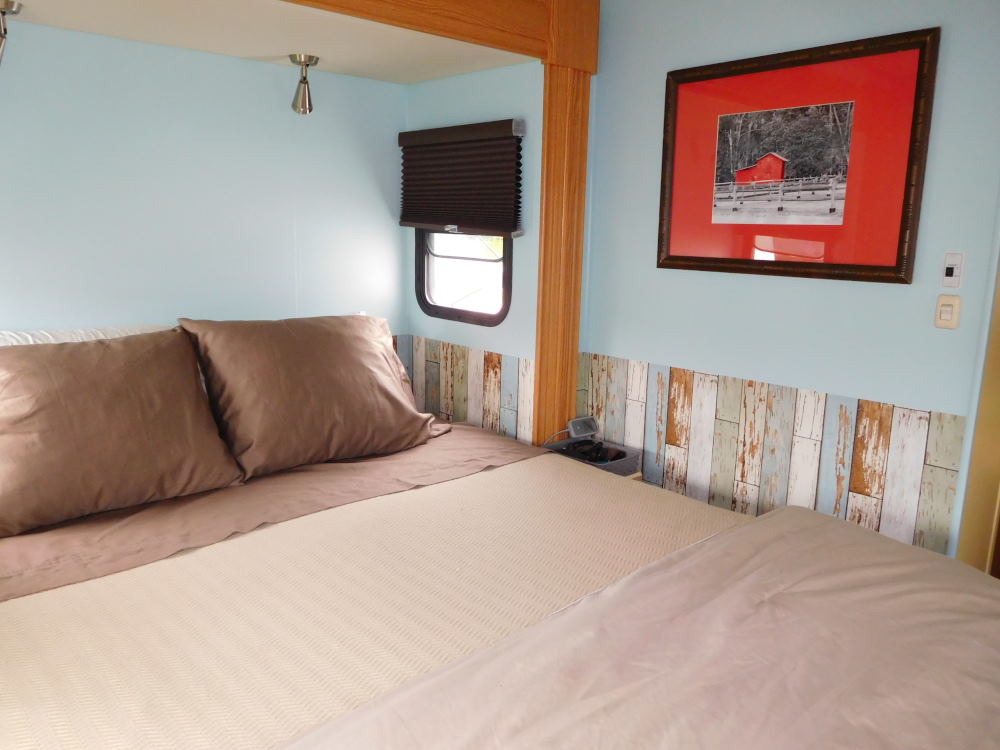 .We planned to install a trim piece at the top of the wallpaper to finish it off, but that ended up waiting for several months. It was actually the last thing we did to finish the room. Next up: Curtains to soften the stark look of the cellular shades, add more color, and wrap around the shade edges to keep even more light out of the room at night. I found these sweet curtains, beaded valances, and pillow cover at one of my favorite online shops, Saffron Marigold. The pattern is "Mosaique Blue", a Moroccan tile print. 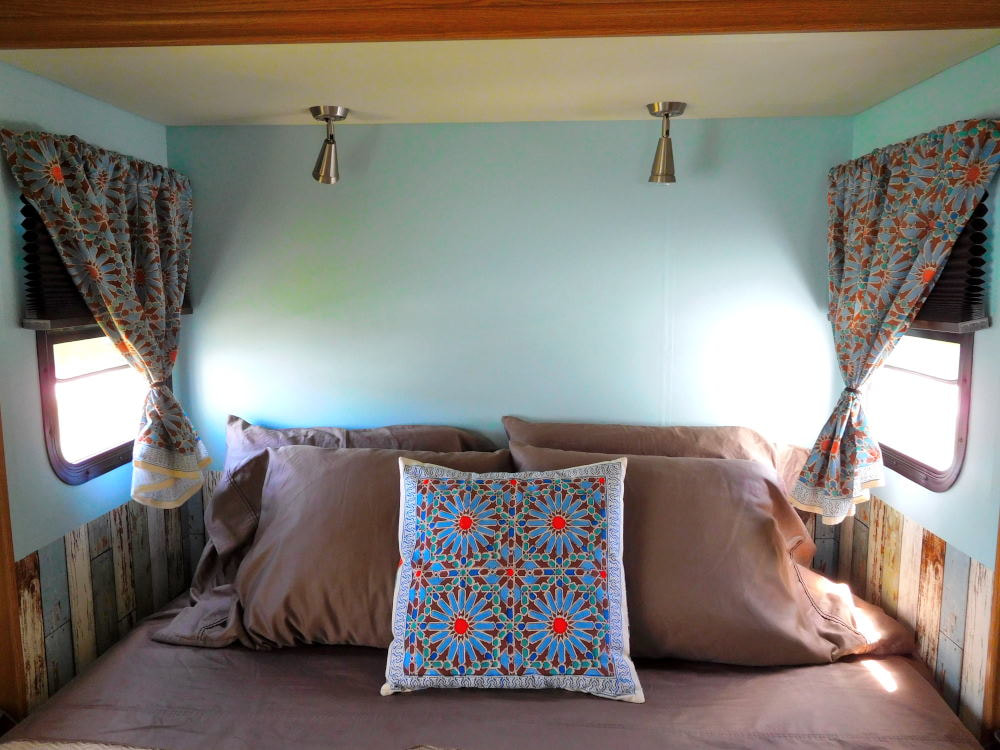 I also added sheer curtains under the valance for when we want light but a little privacy during the day. Since we didn't want to add weight with fancier, heavier rods, we used inexpensive, lightweight aluminum curtain rods that wrap around at the sides to hang the curtains. 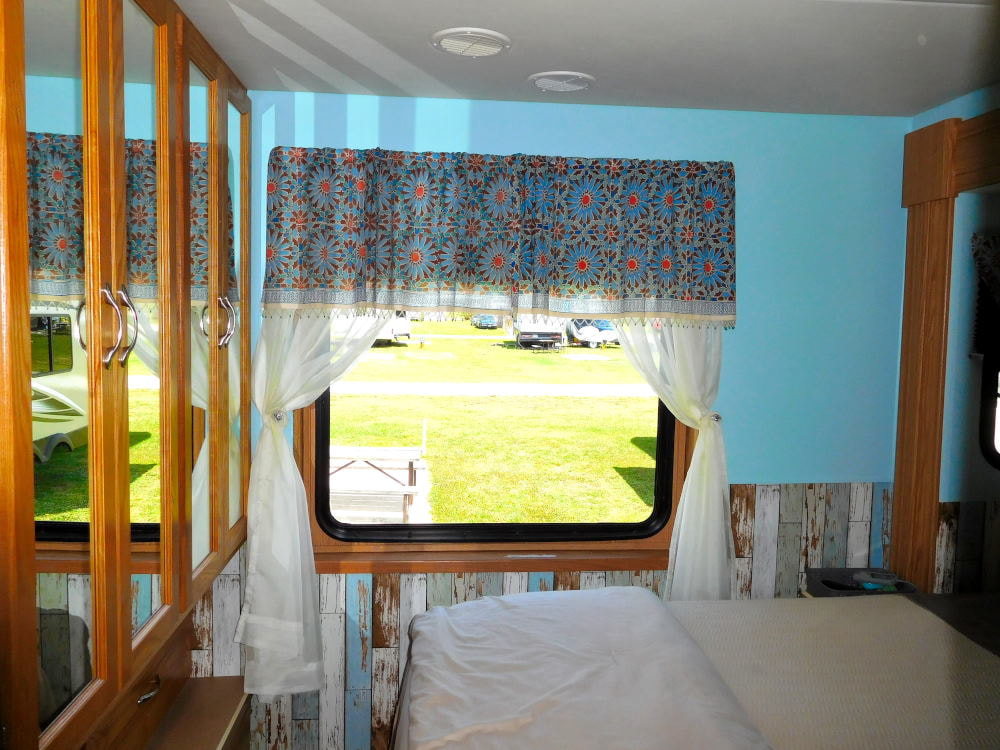 This past summer we purchased trim pieces to finish off the top of the wallpaper, like a chair-rail molding. We bought lightweight pine lattice boards, which were just the right size for the space, and Barry cut them to size. I then painted them the same color as the walls before he installed them. I really like the way they finished off the room. And they'll keep the top edge of the wallpaper from peeling off; a win-win. 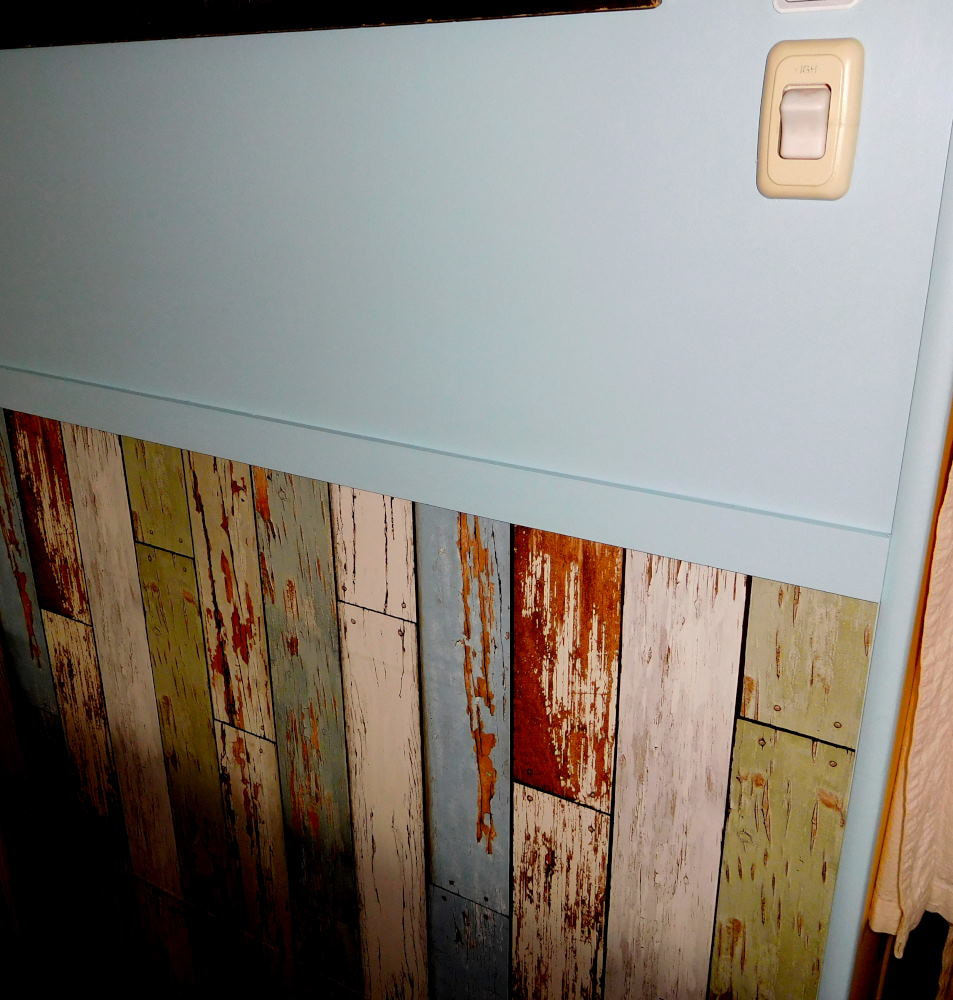 I repurposed an old tablecloth of my grandmother's as a bed scarf -- it was just the right color and brings me happy memories.  The final touch was installing this folk art wooden sheep above the bed, in lieu of a headboard. This whimsical piece had been stored in my mother's basement since we'd sold our home in North Carolina. There it had been in our living room, but it actually suits a bedroom better (counting sheep, right?!) Its colors, purely by chance, blended perfectly with our newly redecorated bedroom!  Here's the final side-by-side. We certainly like the new look better, and it was well worth the wait!
6 Comments
|

Emily & BarryWe're a long-married, early-retired couple who are currently traveling as nomads with no fixed home base. After years of living in North Carolina (Emily's home state), we spent 18 months living oceanfront on Ambergris Caye, Belize, a year road-tripping the US in a Honda CR-V, a year in Playa del Carmen, Mexico, and are now roaming North America in our 32' motorhome, Pearl, following warm weather whenever possible. 
Paisley, May 2016

States visited (pre-RV)
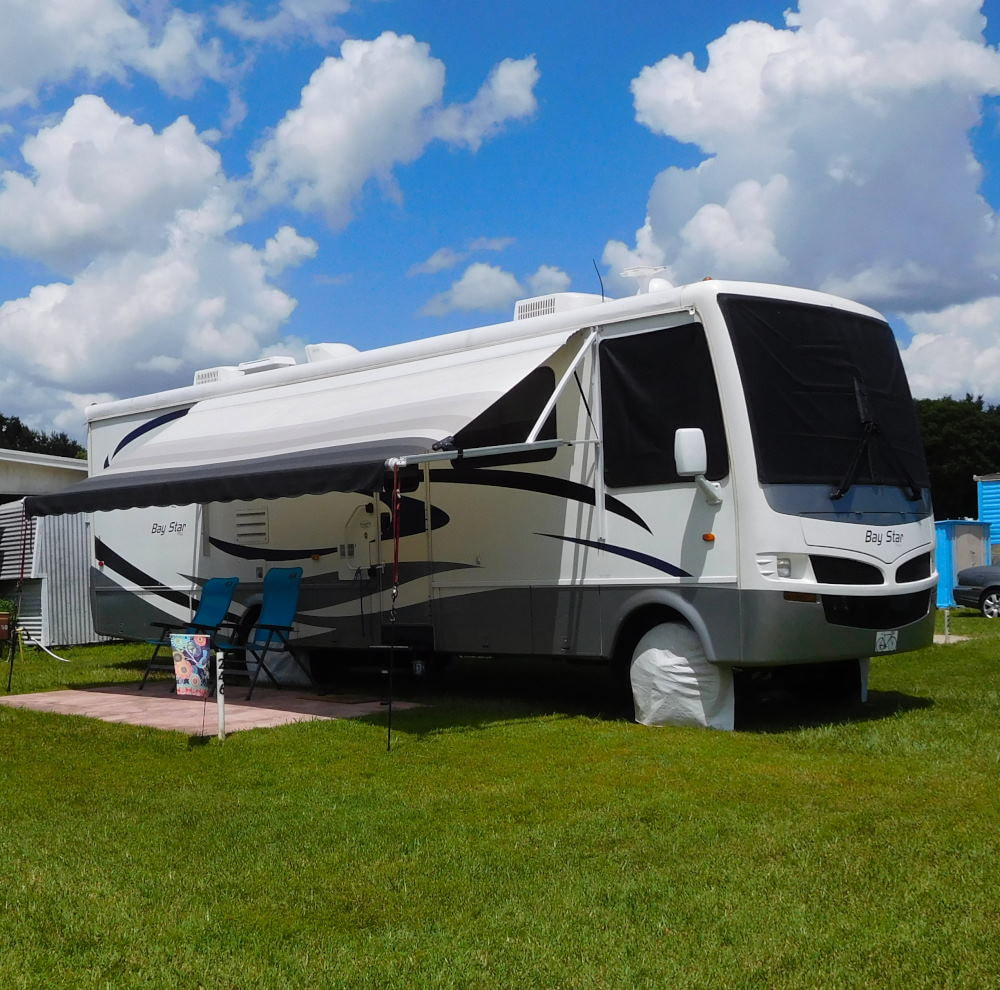
Pearl, a 2007 Newmar Bay Star

States visited in "Pearl"
Archives
July 2019
Favorite Travel Blogs |

 RSS Feed
