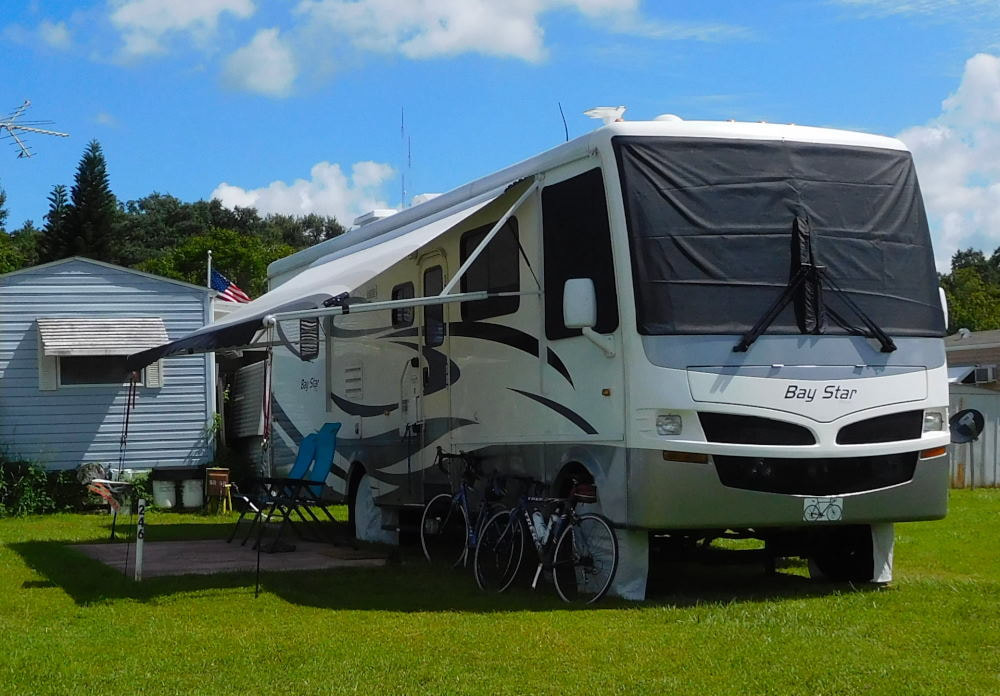
"Pearl" in Winter Garden, Florida
|
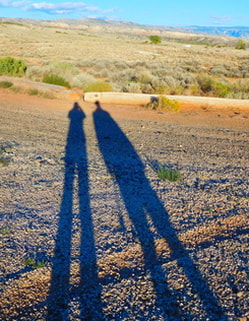
Long shadows in Wyoming
|
|
When we bought our motorhome Pearl a year ago, we knew that one improvement we'd really like to make is adding a kitchen backsplash. Here's how she looked when we took possession.  I don't even remember where I first heard of self-adhesive Smart Tiles, but once I did, I knew they would be perfect in Pearl. They look like glass tiles but are made out of a lightweight gel and apply easily in sheets with peel-off backing. Sounded like a very doable project for the home DIYer. I ordered my Smart Tiles last winter because the pattern I wanted, Idaho, was on half price (still is, but I didn't know that!) Little did I know how long it would take before I could actually even think of installing them. Getting from the above situation to the point where I could install the Smart Tiles took quite a bit of preparation; in fact, we worked off and on for months. Here's what we (mostly Barry!) did beforehand:
And of course, we were working on other projects concurrently as well as traveling, hiking, cycling, and doing other things! But we finally got all the preliminary work done, and I could actually do the final wall prep for the Smart Tile installation. After all the above, the rest of the project only took a day! In the morning I began by removing all the electrical faceplates and the rusty, grungy mini-blinds, which went right into the trash. Good riddance! Barry unscrewed and removed the window frame, which I highly recommend, as you can cut the "tiles" and cover the cut edges when you reinstall the frame; gives a professional look since the raw edges are completely covered. I wanted to make sure the adhesive tiles would really stick, so I lightly sanded the walls, then washed them with TSP, which I rinsed and let dry. After lunch the real fun began! I was kind of terrified, but after watching several helpful installation videos online, I felt more confident. Smart Tiles cut easily with a sharp utility knife or pair of scissors (I used the latter more), so you can fit them into all those oddball spaces. I started placing the adhesive tile in the corner behind the cooktop and worked in either direction away from it, keeping the lines as level as possible. Overlapping the "grout" lines kept things lined up for the next tiles. It really wasn't bad, except for a few tight spots around the electrical boxes, where careful cutting was required. Here are some action shots Barry took of me working away. In this first one, you can see what a mess the walls I was covering were.  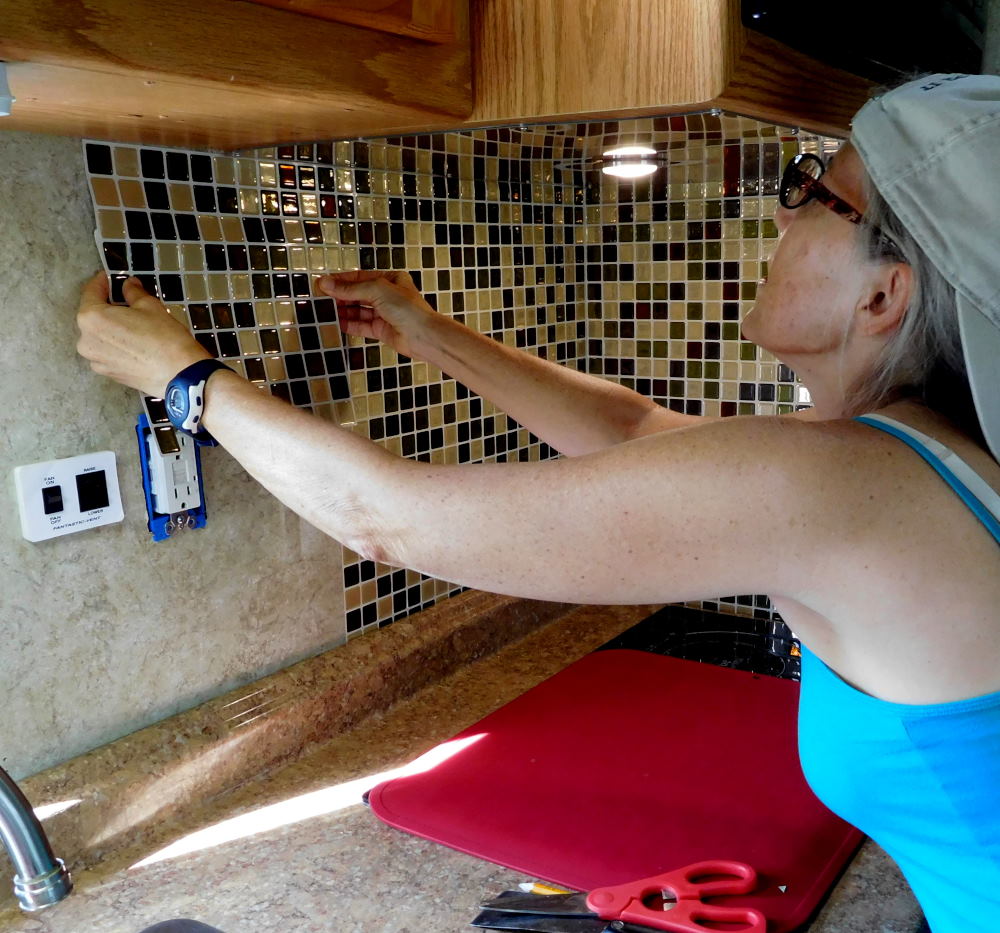 And here is the finished product! We just love the look. It really does look like glass tile, and at night it is especially sparkly. 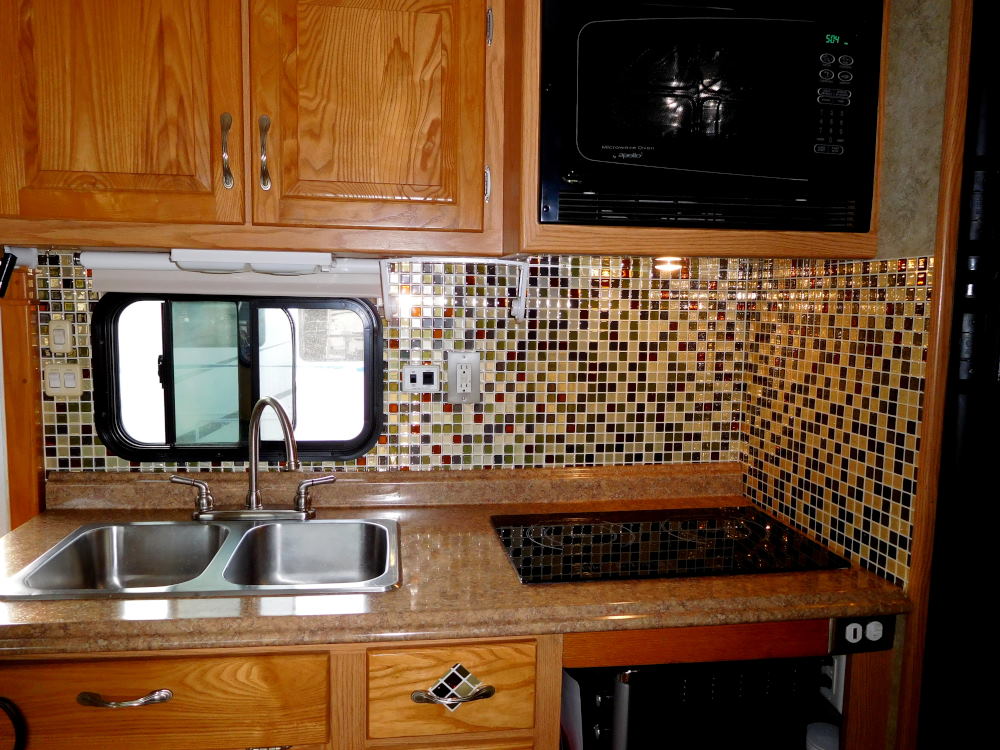 Barry installed a new vinyl roller shade to replace the old mini-blinds. He is building a box for me to paint to cover up the workings. 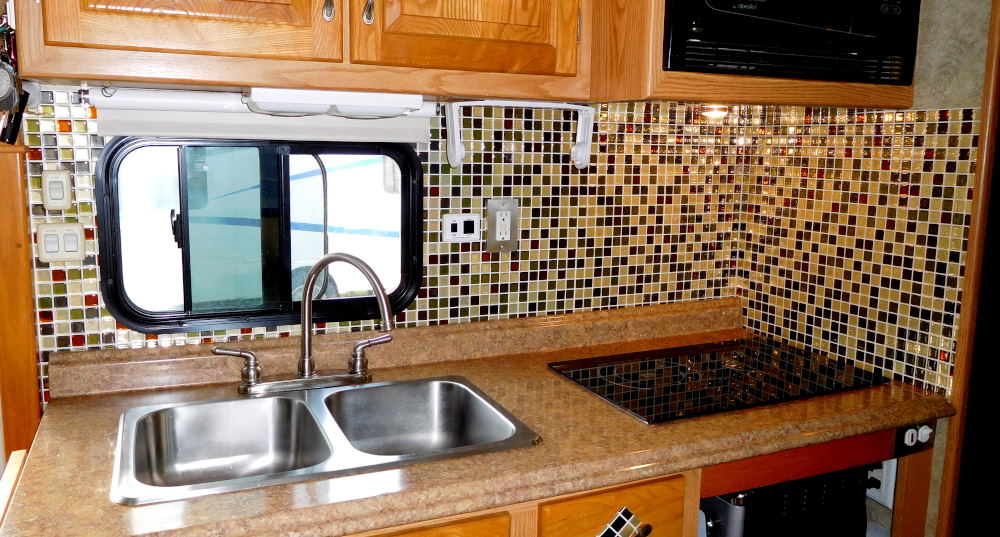 Here it is with all our usual "stuff" back in place. 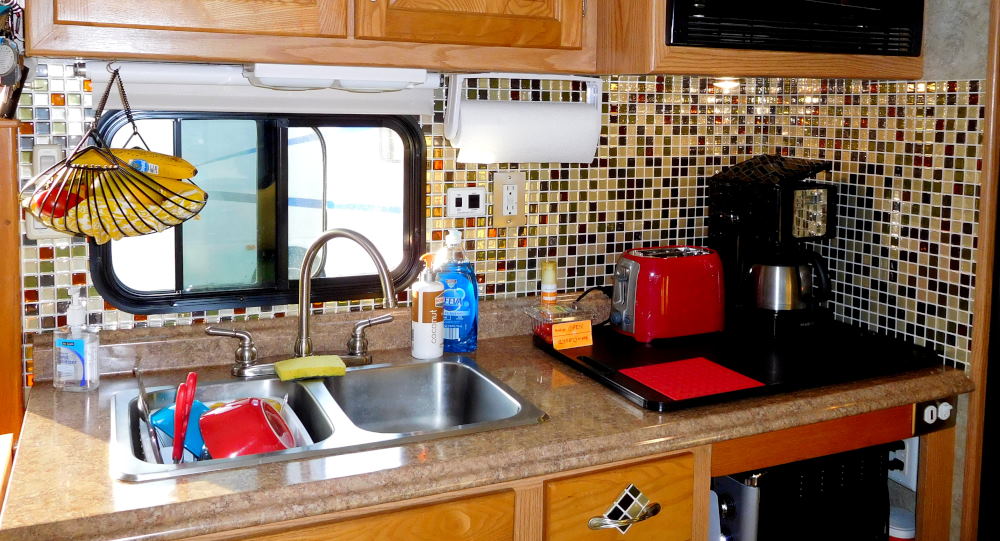 We just couldn't be happier with our Smart Tile backsplash. The best thing about it for an RV application is that it adds no weight, compared with real tiles. Weight is always an issue in an RV, especially for we full-timers, as we're typically carrying more clothing, food, tools, and other gear.
I like the Smart Tiles so much, I've already ordered some to do our bathroom next! Note: Smart Tiles are available through various sticks & bricks and online outlets, including Home Depot, Wayfair, and Amazon. Not all patterns are available everywhere, and I actually found that ordering direct from the manufacturer in Canada is where you'll find the best sales on at least some of the patterns, I got both of my patterns for 50% off there! The website is: https://www.thesmarttiles.com/. There are also competing brands, but I've heard that some of them are not as high quality as the originals.
6 Comments
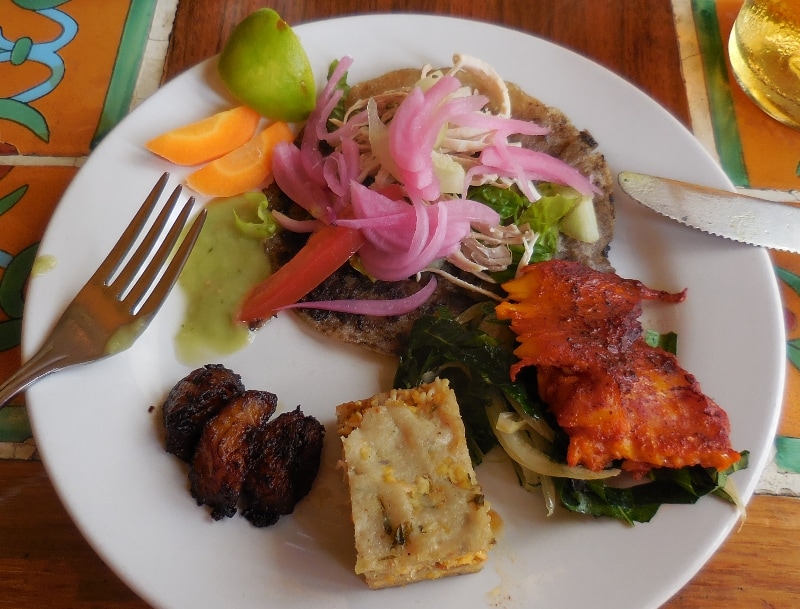
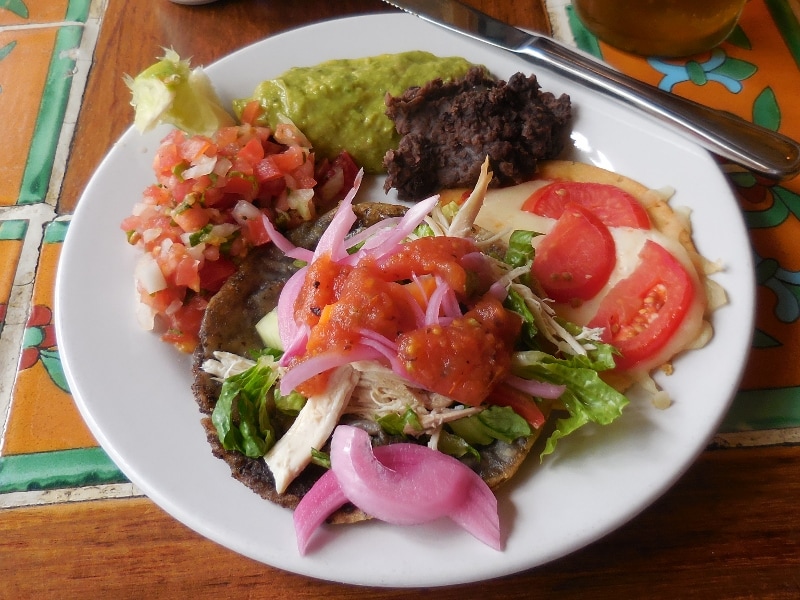
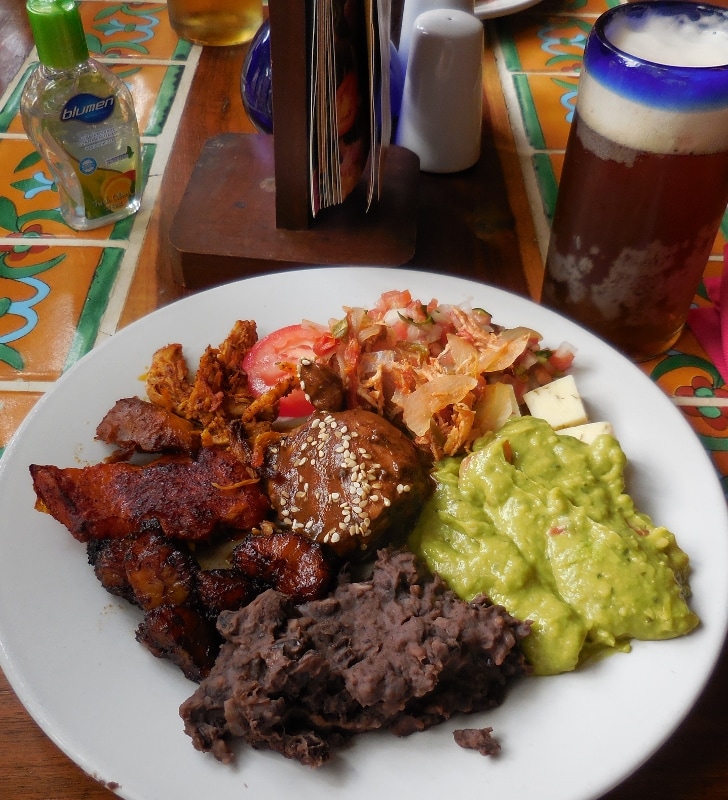
There's so much to see and do in Valladolid, it's taken us three posts just to cover our three days there. In case you missed the previous posts, here are Part 1 and Part 2. Now onto Part 3! Everything we read ahead of time about the city said not to miss the Franciscan Convent of San Bernardino de Siena, Built in the mid-16th century, the convent was actually the first church built on North American soil. It was a bit longer walk from our hotel on the town square than some of the other city sites, but so well worth it as there are many fine examples of colonial architecture along the way. Here's some of what we saw on the way to the Convent. 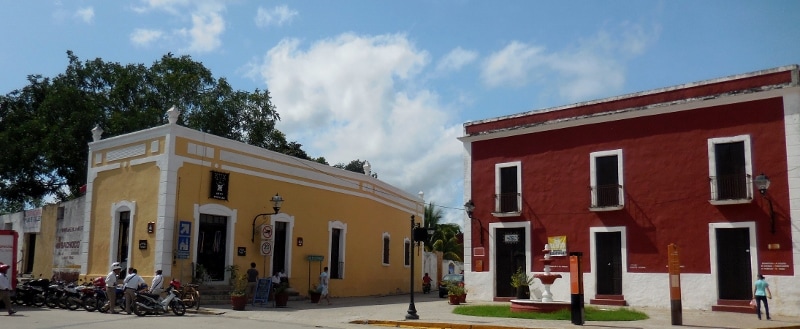 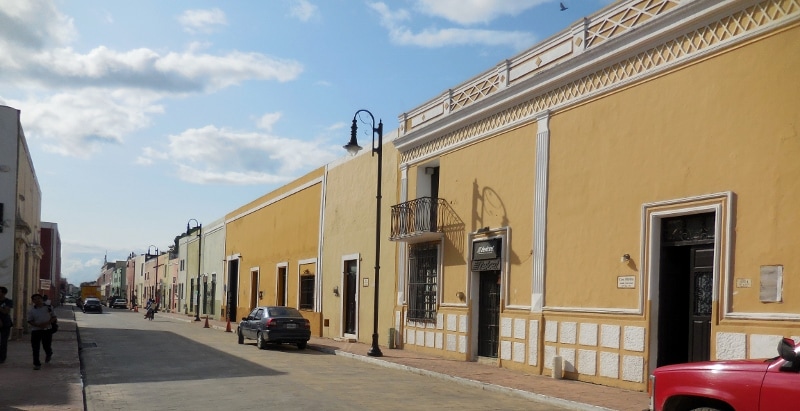  And here's the imposing convent itself. We managed to visit at a time when there were virtually no other tourists around. I only wish the sun had been better on the front for photo taking. 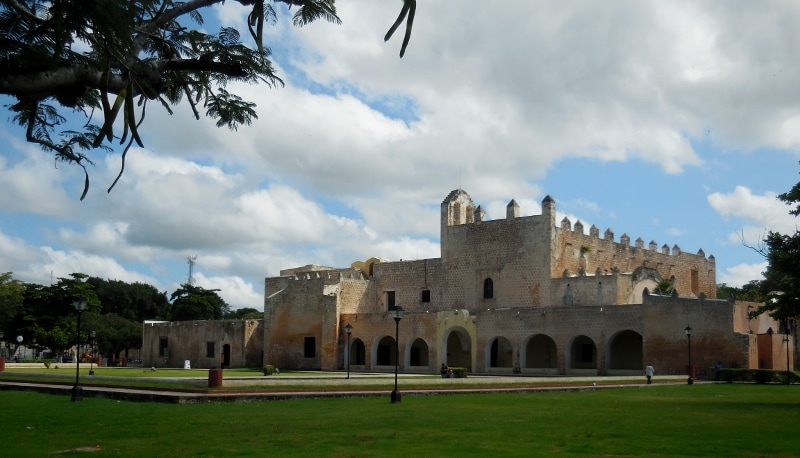  The sun was hitting this side really nicely! 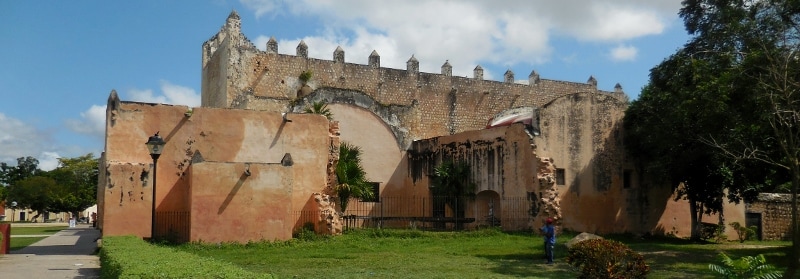 We were able to take a look inside the main sanctuary. It was deserted. 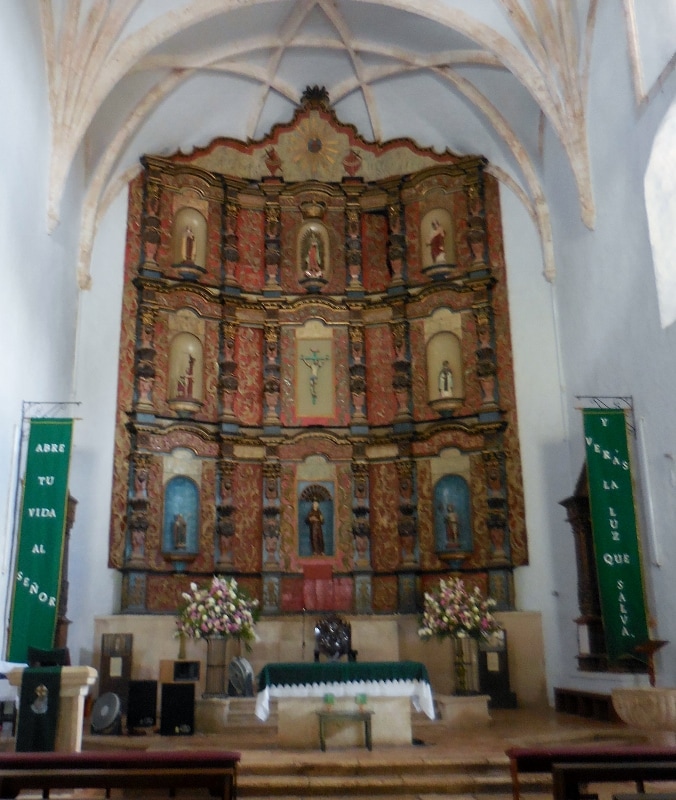 I had read that there was some of the original 16th-century artwork preserved along the sides. My photo is a little blurry, but then, so was the ancient artwork! 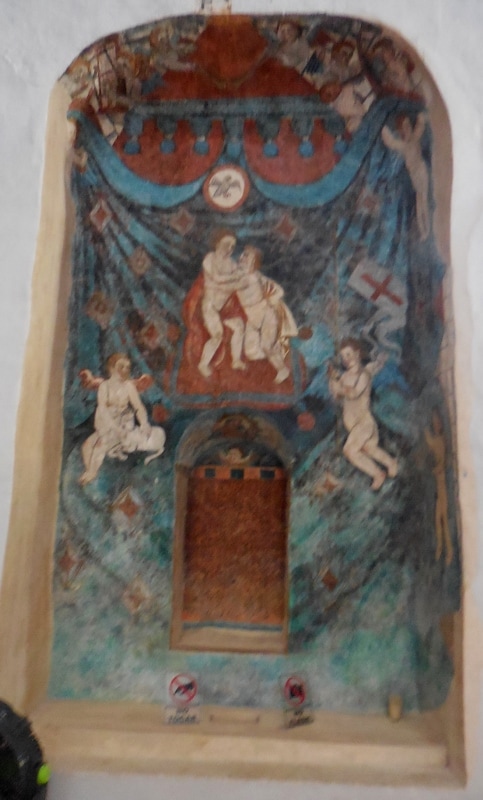 Here several additional churches we checked out on our walks around the city. This one is the Iglesia (church) Nuestra Señora de la Candelaria in one of Valladolid's prettiest neighborhoods, aptly called Candelaria. 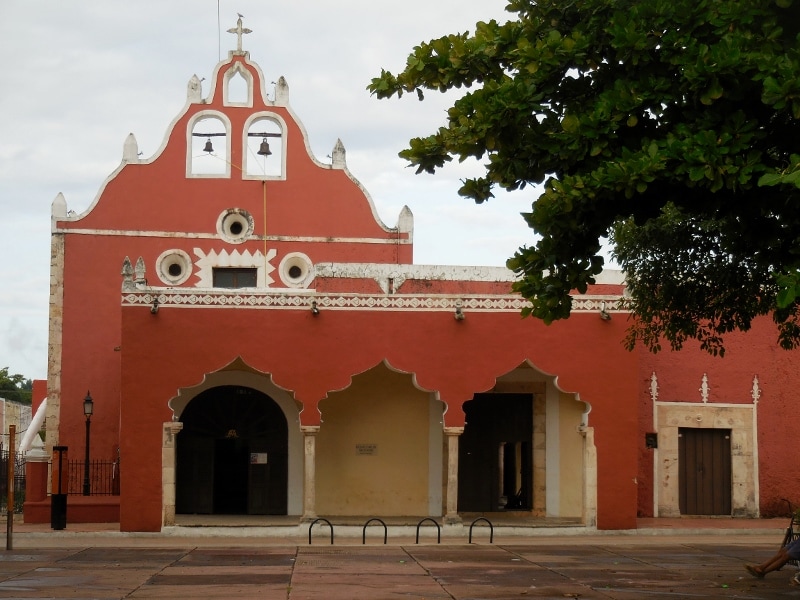 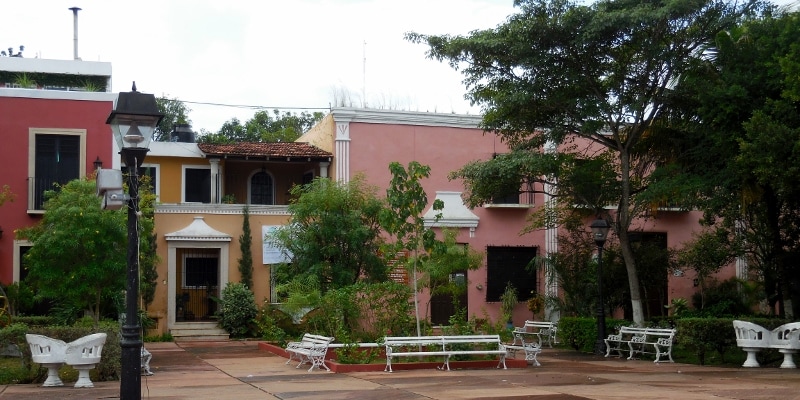 Street in Candelaria And here is the Santa Ana church in the neighborhood of the same name. 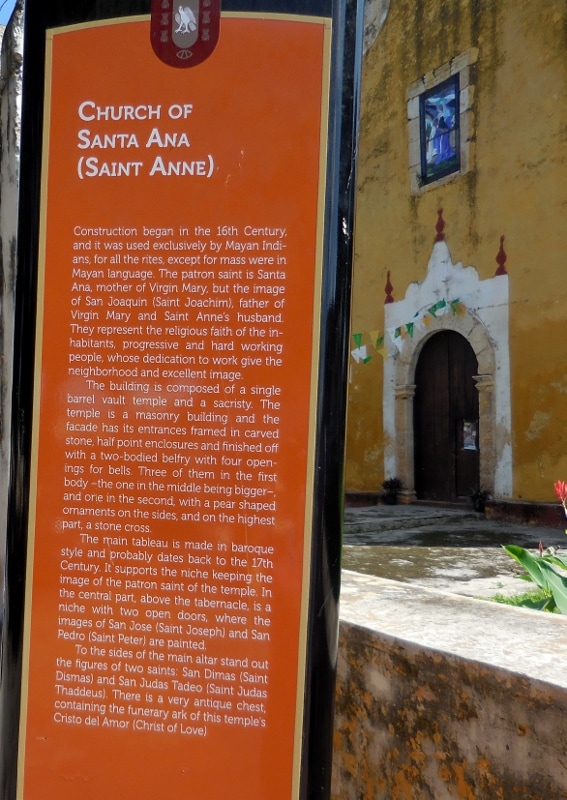 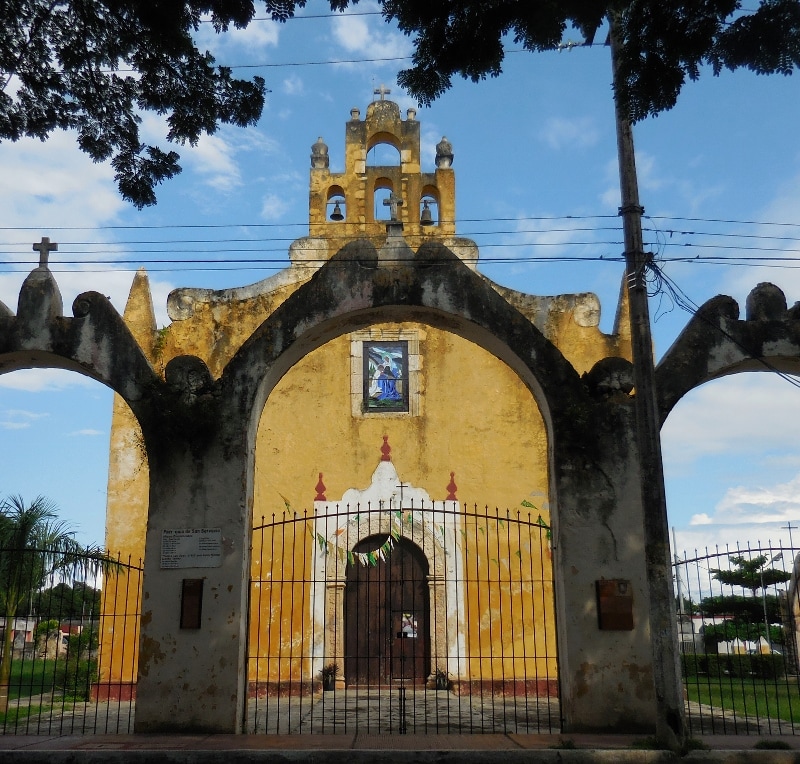 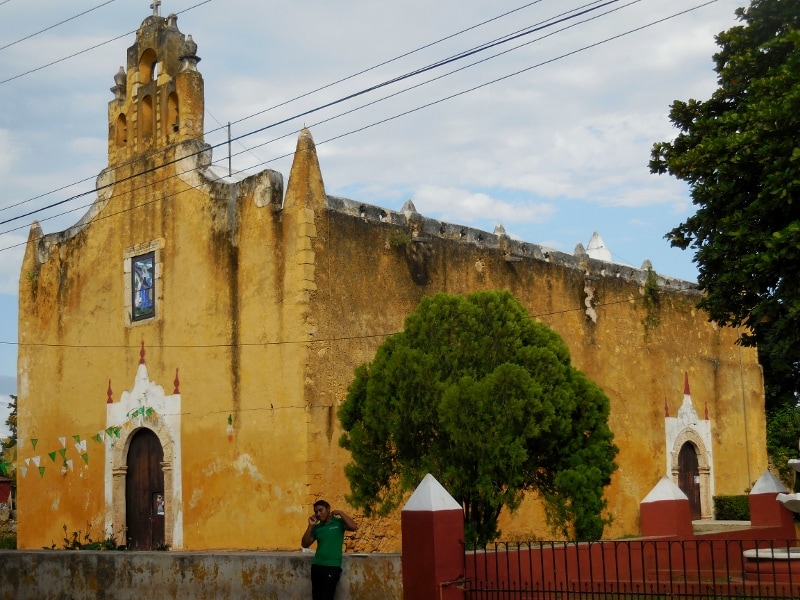 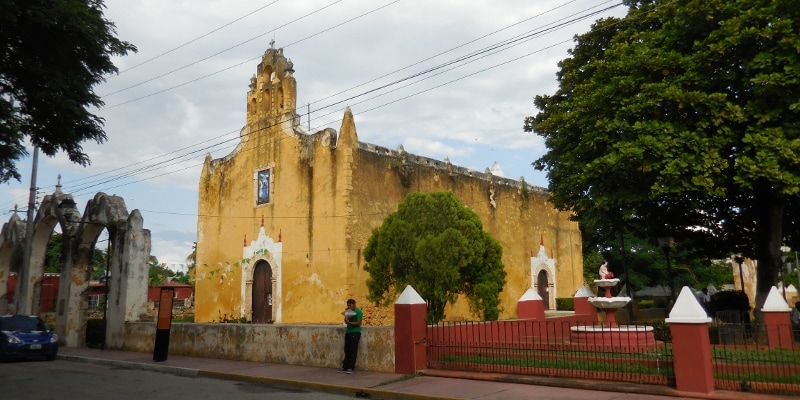 I even got in a little extra workout in the Santa Ana neighborhood park! 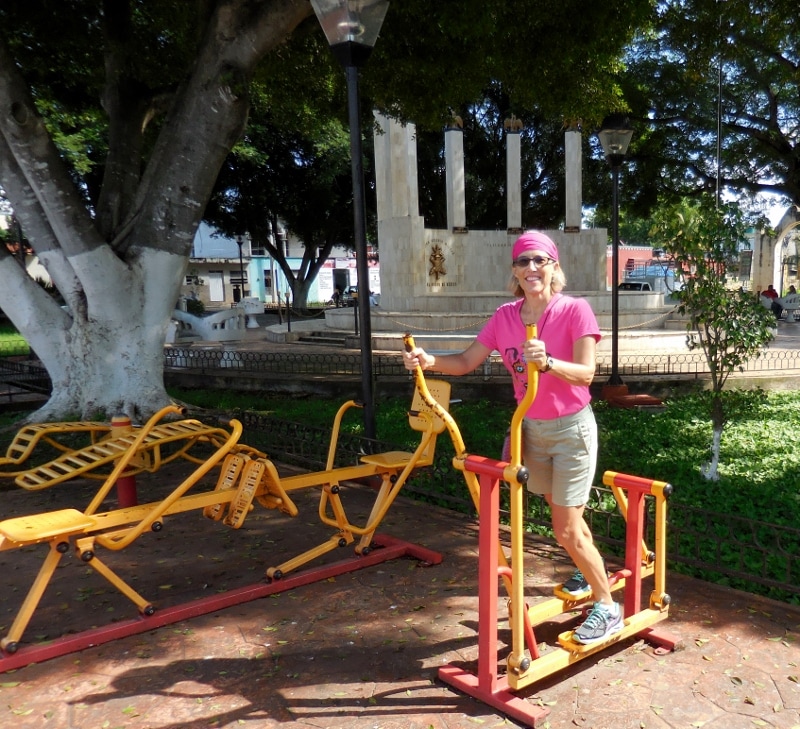 The last church we saw was the Iglesia de San Roque in the Santa Lucia neighborhood. 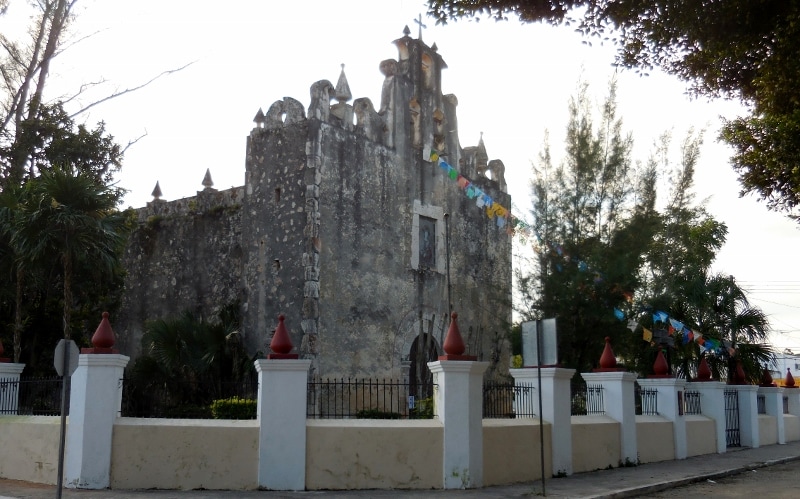 After all that walking, we worked up quite an appetite, and one of the highlights of our time in Valladolid was visiting La Casona de Valladolid for the most amazing buffet lunch. We had read about this buffet ahead of time, and while it was a little pricey, you could definitely get your money's worth if you brought your appetite. (We did.) 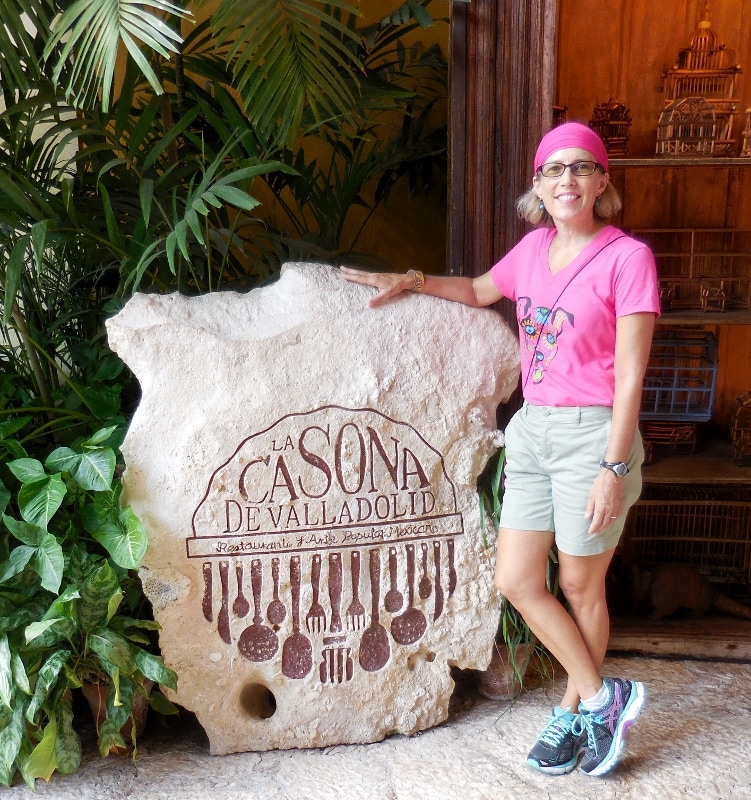 Since we arrived a little early during the restaurant's setting up for the buffet, we took a stroll around their very decorative courtyard garden area. 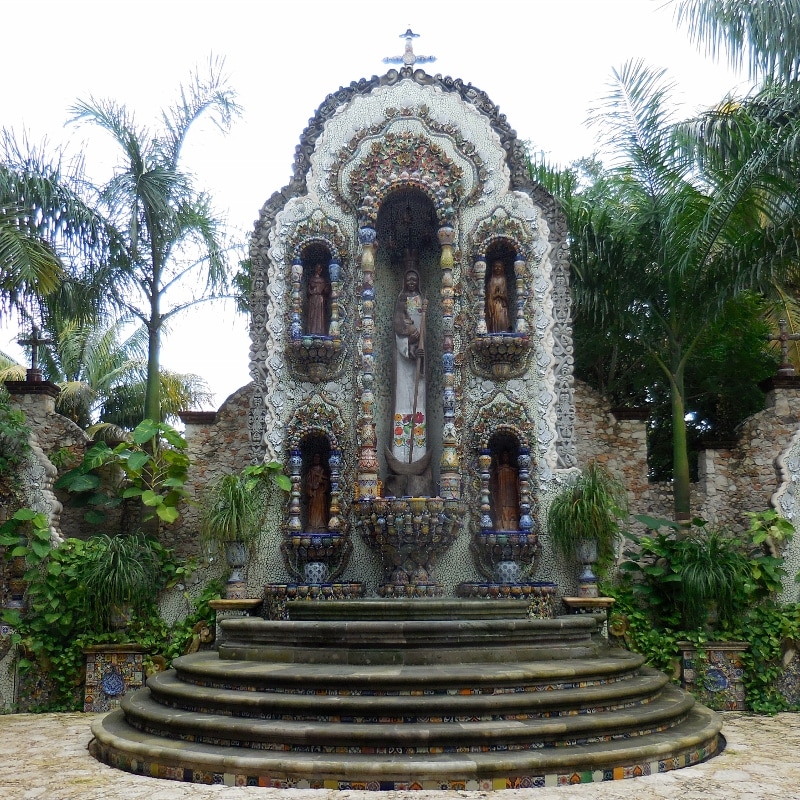 This interesting fountain was made of many brightly colored ceramic bowls, plates, cups, and mosaic tiles. 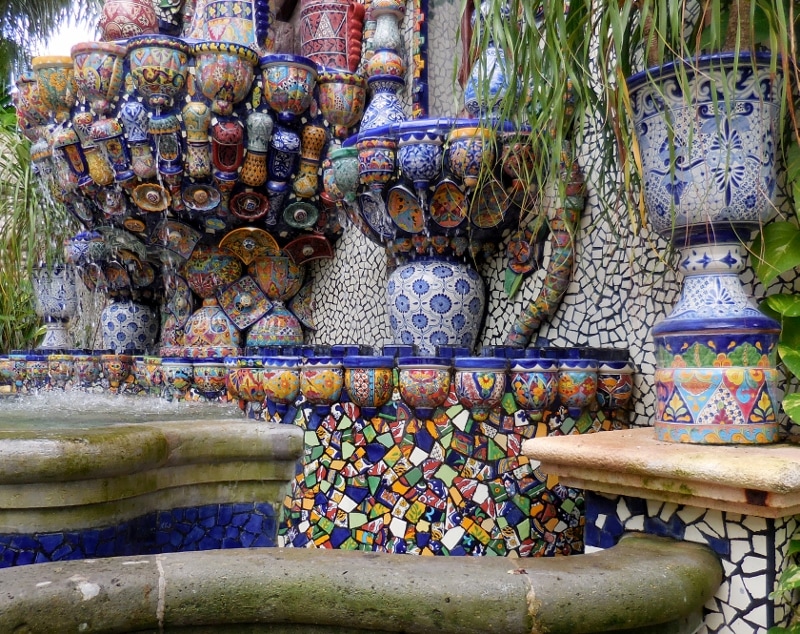 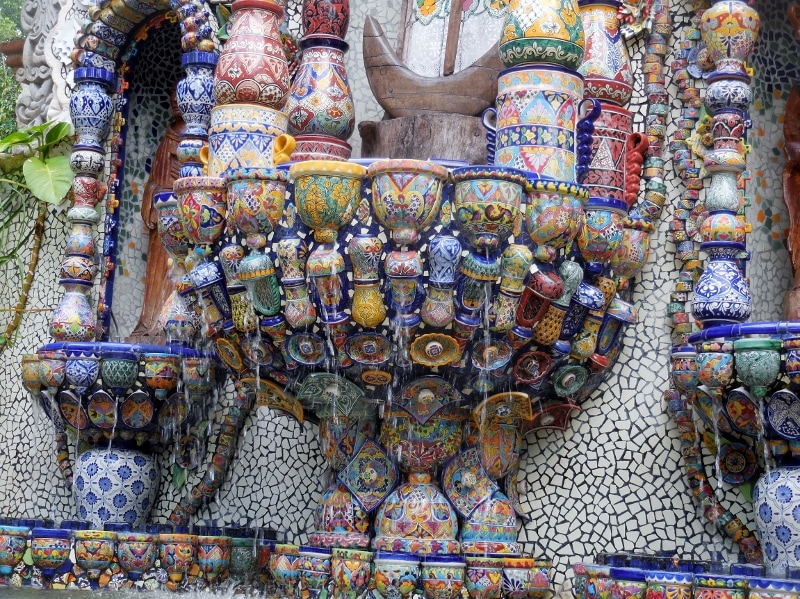 See the frog spitting at Barry?  Here's the buffet area. We were the first ones there! 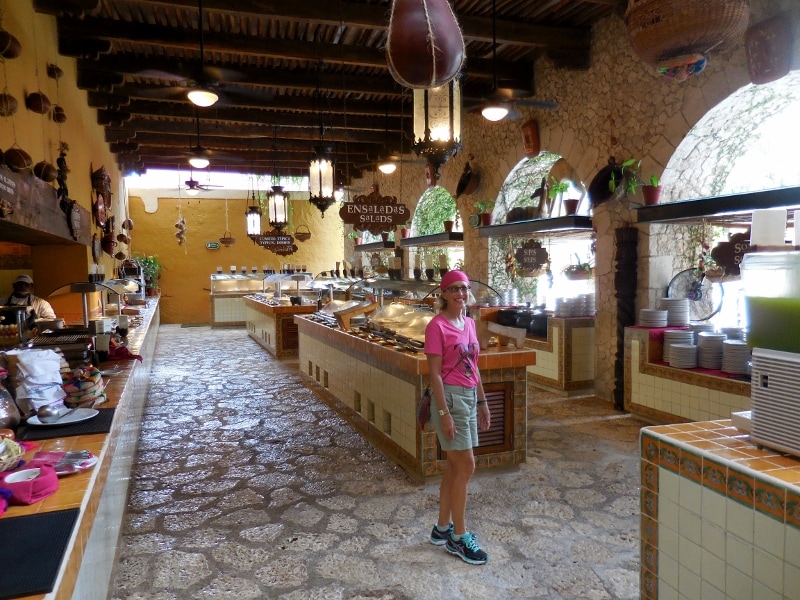 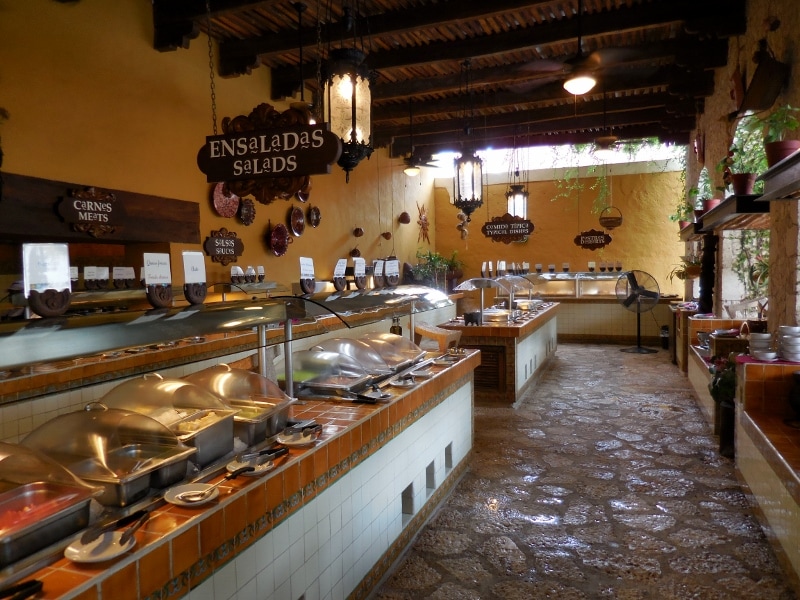 In addition to a variety of traditional Mexican juices, beer on tap was included in the buffet price. 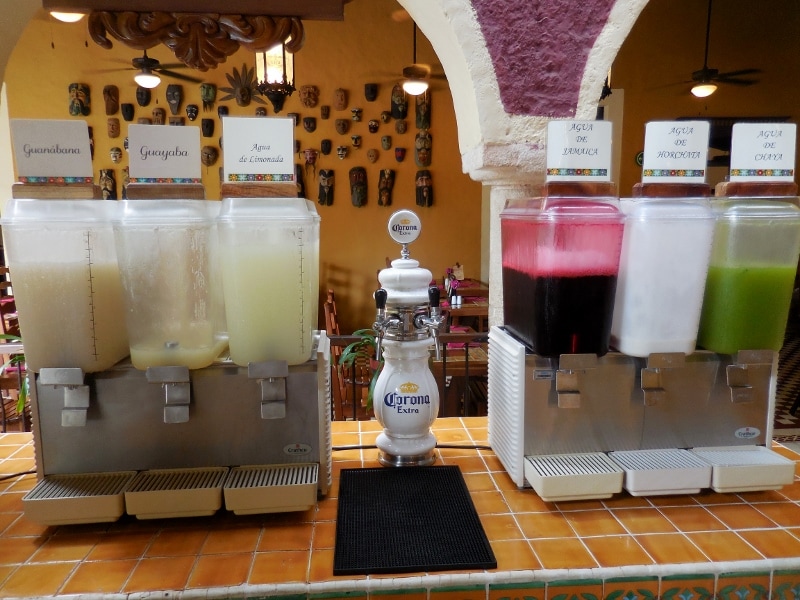 We could see these interesting masks from our table. 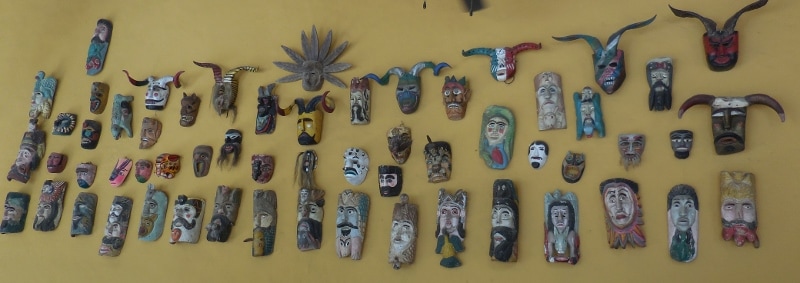 Ready to chow down! 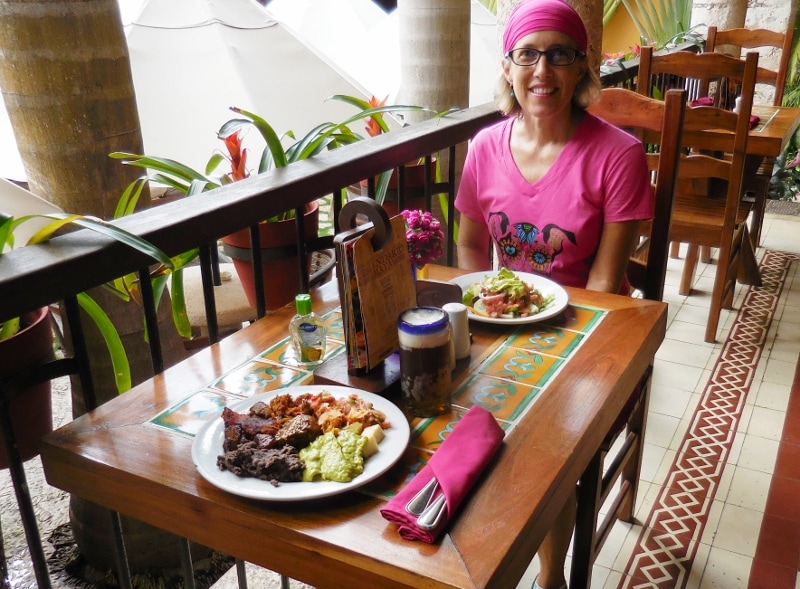
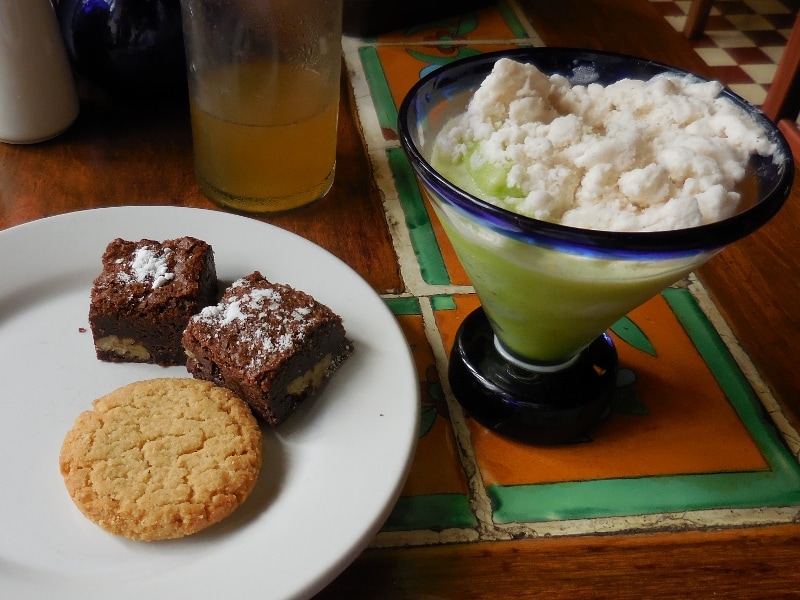
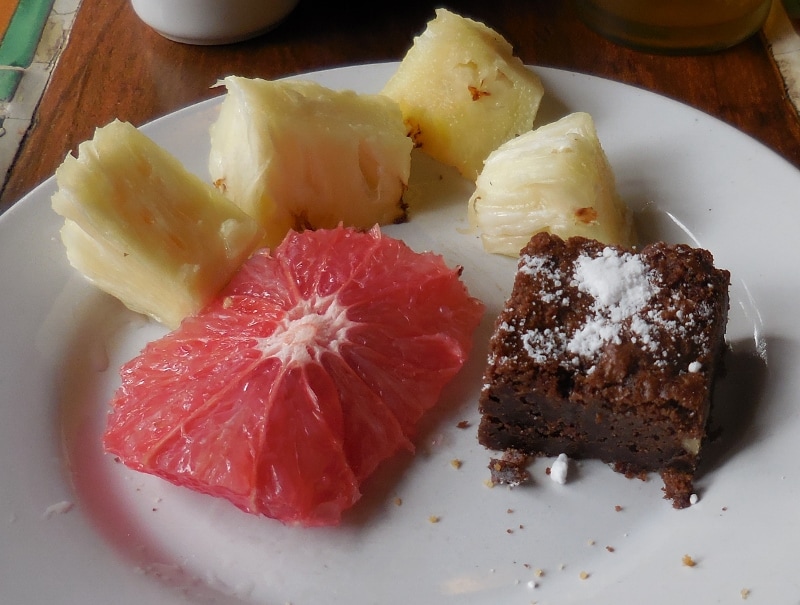
 Fortunately the desserts were fairly light. We were stuffed but managed to sample a few postres.
As you can probably imagine, a lunch like this means a very light dinner -- all we could manage was soup and a fruit/veggie smoothie!
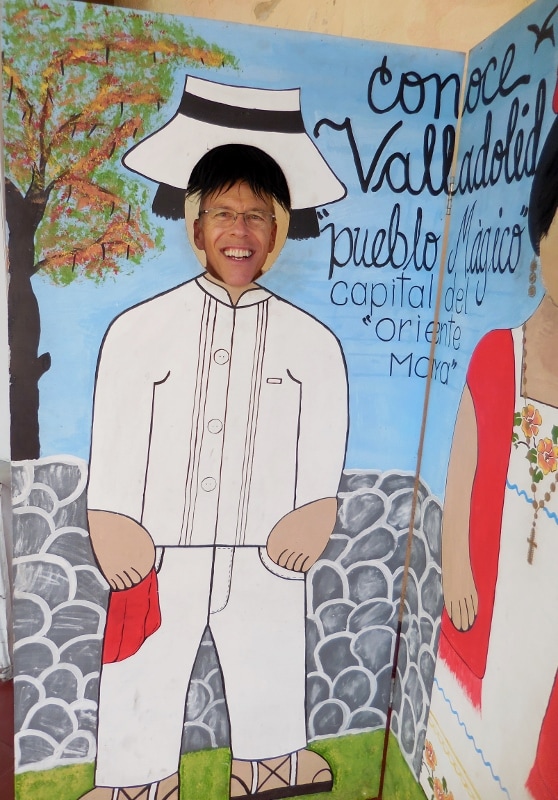
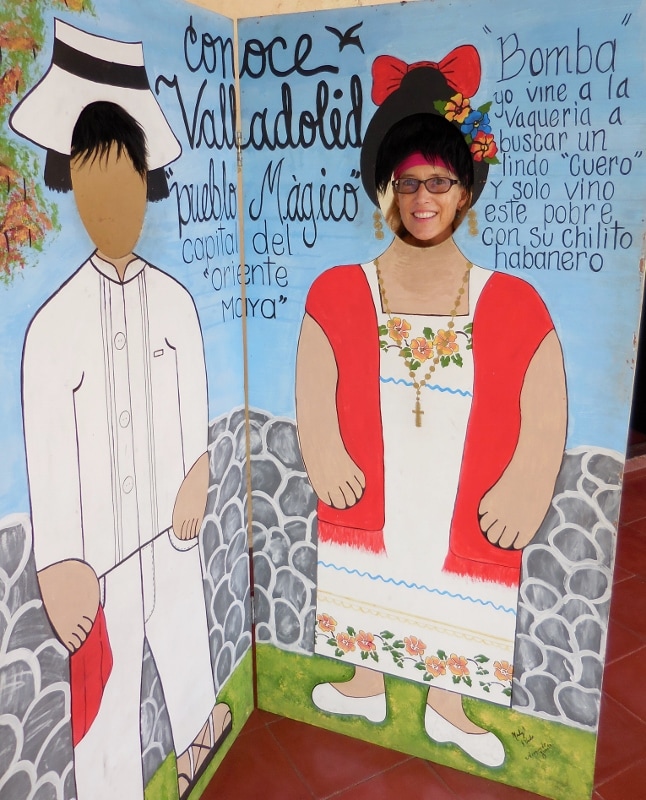
So that's our trip to Valladolid. We thoroughly enjoyed our all-too-short stay in this charming pueblo magico and hope to visit again one day. Although we only spent two full days in Valladolid in Mexico's beautiful Yucatan state back in October 2015, we stayed busy sightseeing and packed a lot in. Here's Part 1 of our adventure, if you missed it. There is plenty to see in this charming colonial city, so come along and see what we saw! First up is the Cathedral of San Gervasio, right on the central town square, overlooking the park. First built in 1570, it was destroyed and rebuilt in 1702 after being severely damaged by warring between the Maya and Spanish. It is one of eight churches in the city and one of the most magnificent. 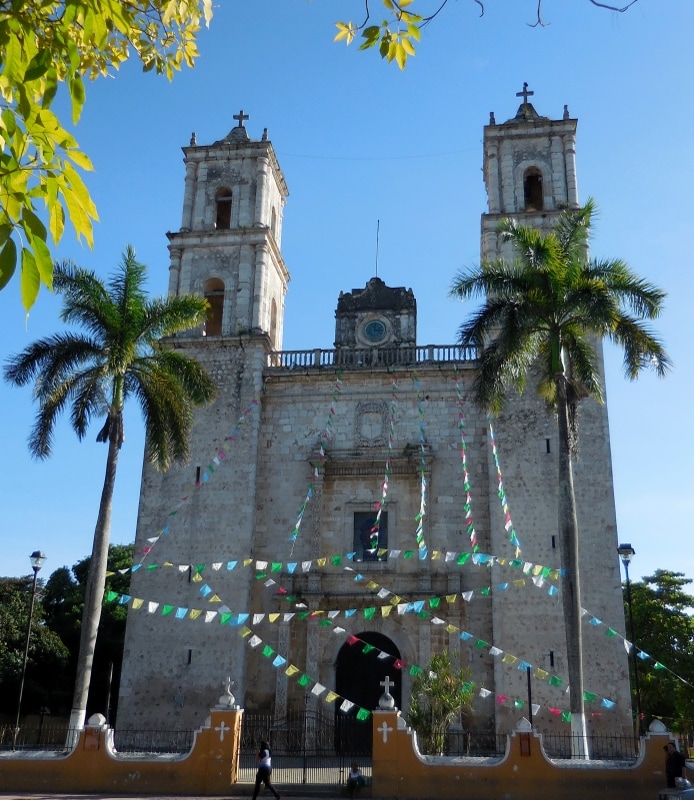 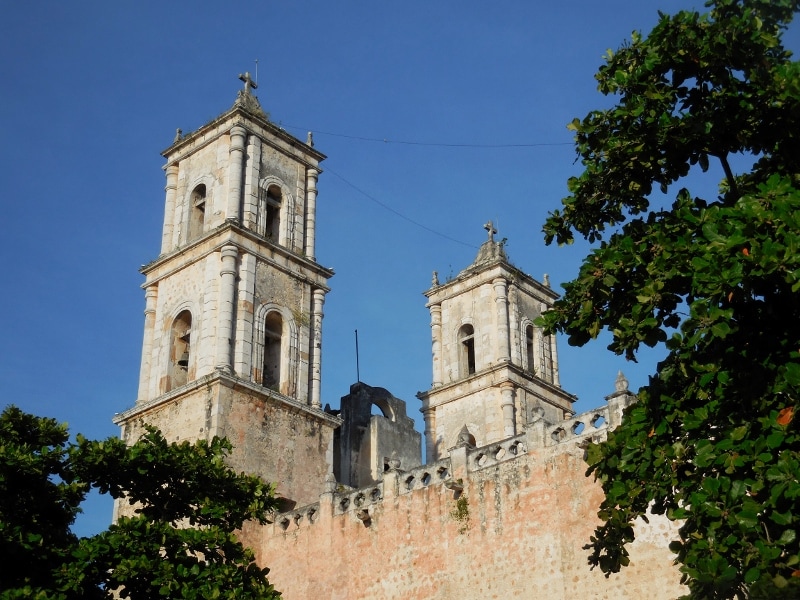 I love the architectural details. 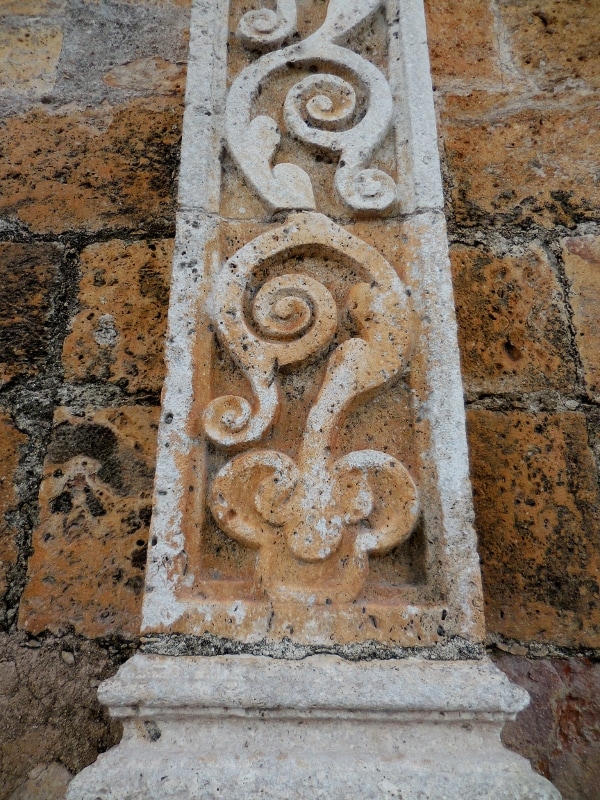 We took a quick look at the dramatic interior. 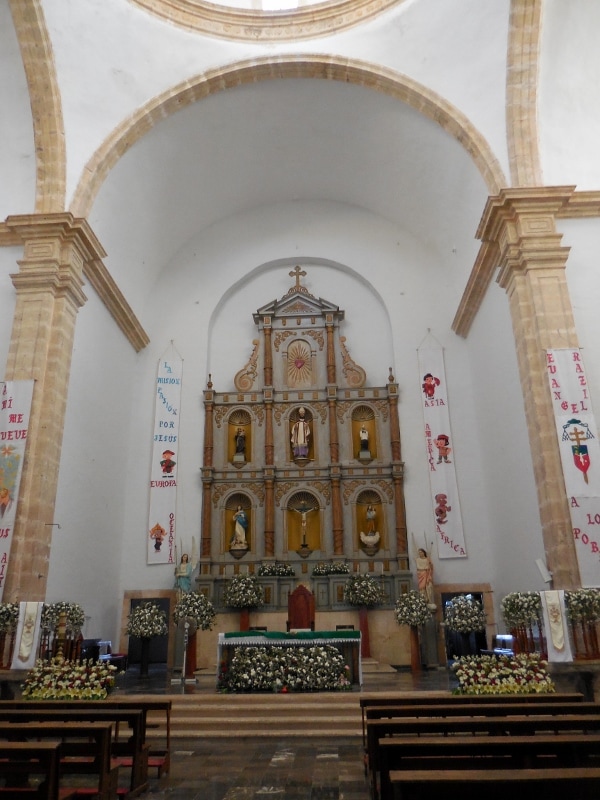 I liked this back view of the two towers through the foliage.  The cathedral is beautifully lit up at night. 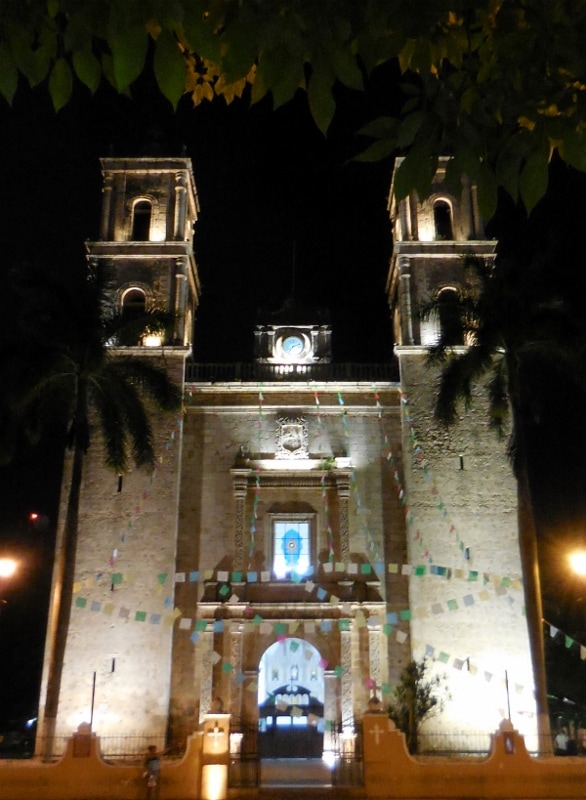 In a more secular vein, we enjoyed visiting a couple of different chocolate shops in town and sampling delicious Mexican chocolate.  We bought a few goodies to take back to Playa del Carmen with us. The shampoo smelled good enough to eat! 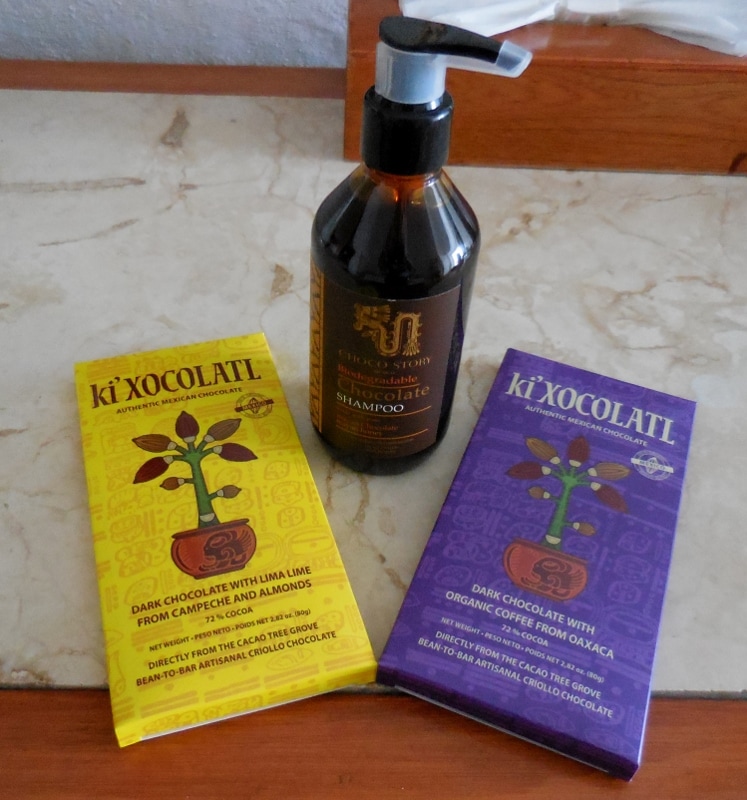 At the second shop we visited, we got a short tour and demonstration of how the Mayans made (and still make) chocolate, from bean to finished product. This chocolate was more rustic and a bit grainy compared to the more refined product above, but equally delicious, with many flavors to choose from, so of course we had to add to our stash! 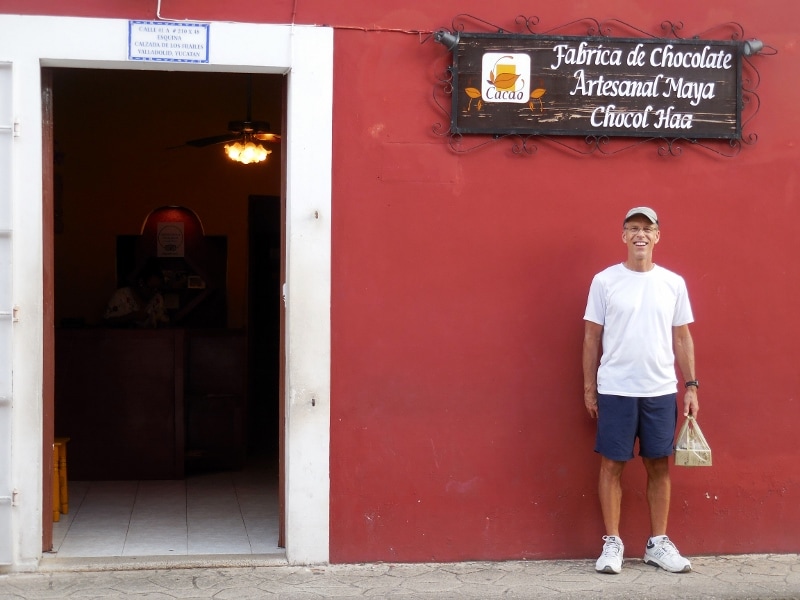 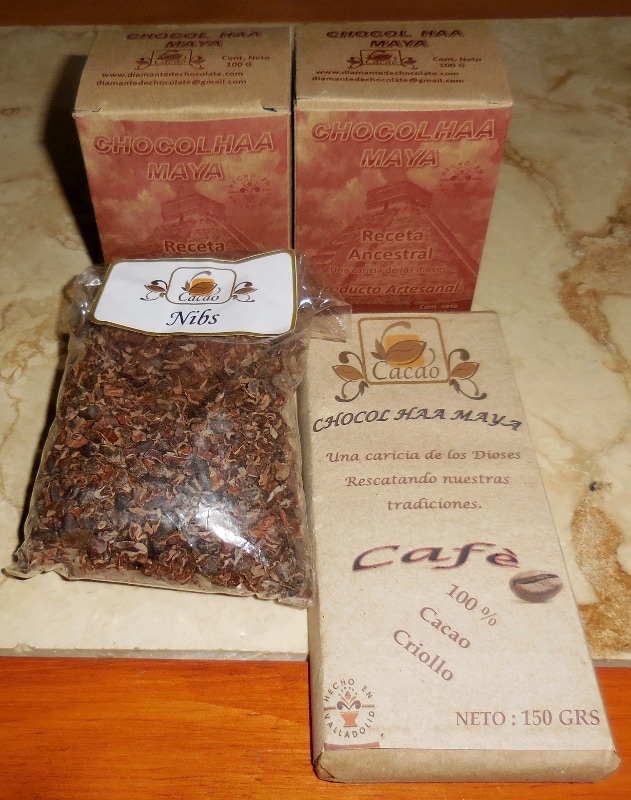 Also an easy walk from our hotel was the central mercado (marketplace), where locals shop for produce, meat, fish, and so much more. We bought some Mexican vanilla and enjoyed wandering the aisles and looking at all our pesos could buy.  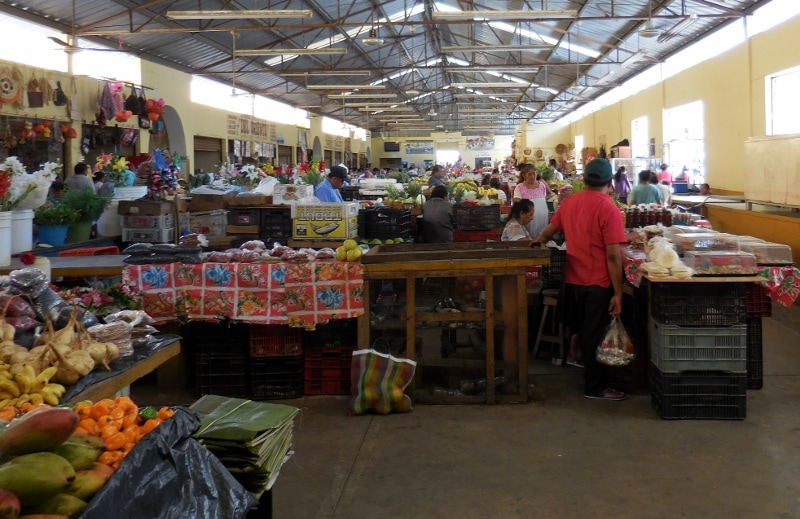 We also visited the Government Palace right on the central square. Similar to one we toured in Merida back in 2012, there were huge murals depicting the often bloody Mexican history lining the walls. 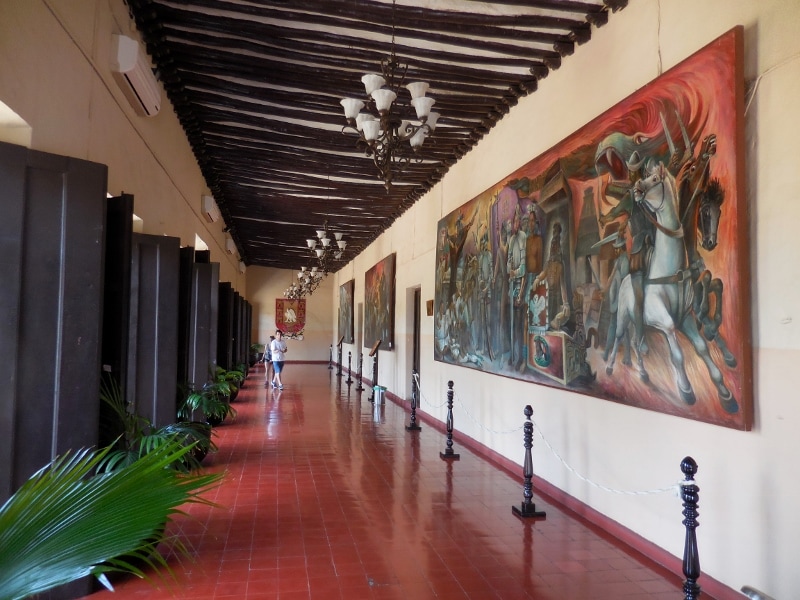 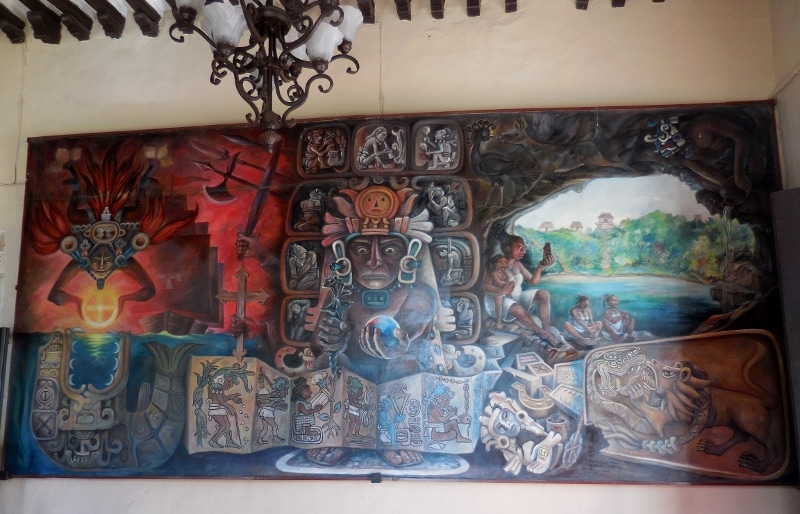 After all that seriousness, we were ready for a little silliness. Barry always balks when I make him do these things, but he humors me!
Another interesting thing in Valladolid is a cenote right in town, the Cenote Zaci. We walked over and took a look. This is a semi-open cenote that has a diameter of 150 feet and is 260 feet deep. There is a nominal fee to enter and a restaurant on site, though I don't believe it was open the day (or time) we went. Supposedly the cenote is good for swimming, but there wasn't much of that going on when we were there. 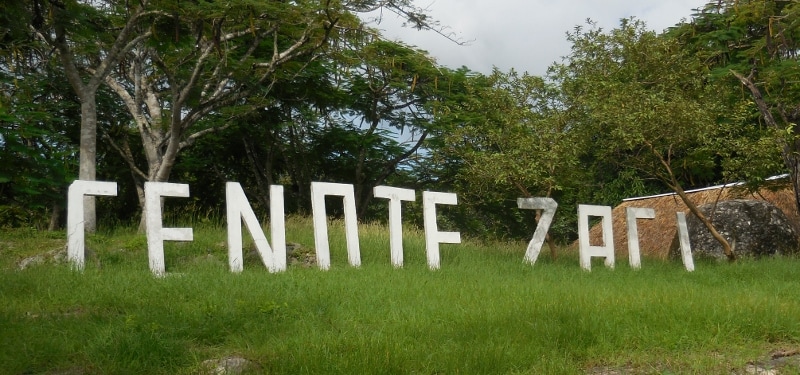 The water looks black in the photo below due to the angle of the sun and the many trees above, but it is actually a beautiful turquoise when the sun hits it right. 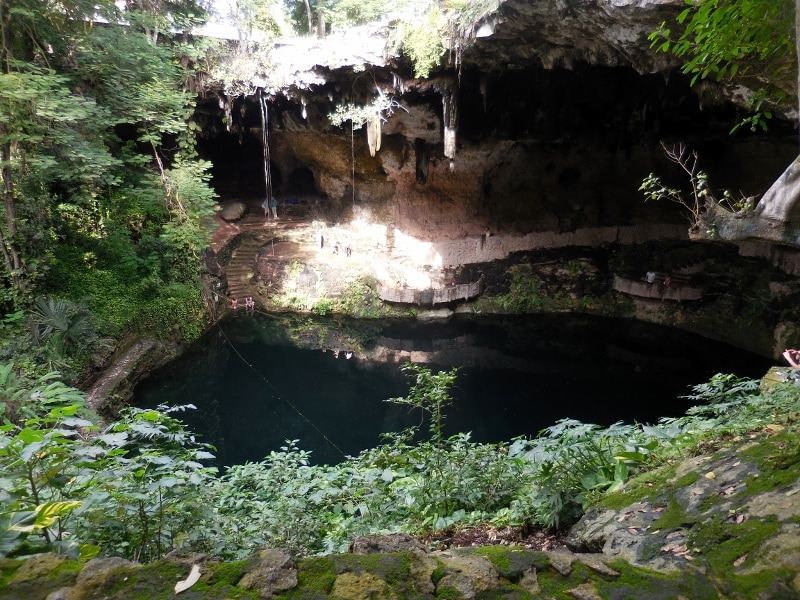 You can see the water color better here; also the groups of tourists that came in on buses. We tried to stay on the opposite side from them! 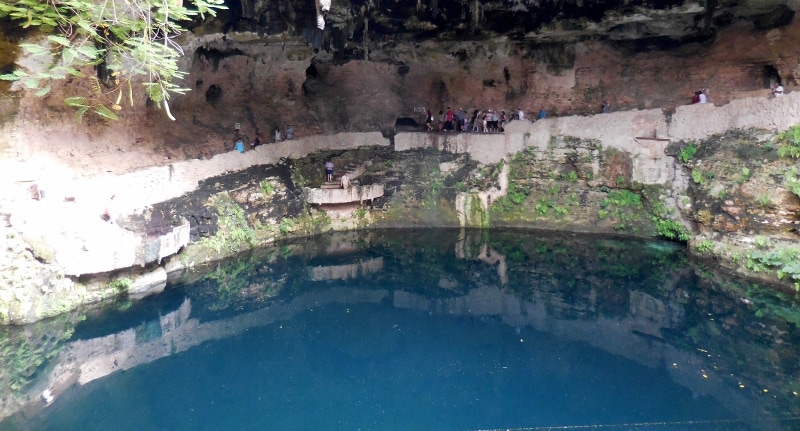  As we walked about town, I found myself attracted to all the old, and often colorful, colonial doors. They are beautiful in their own right, but I also wonder what lies behind each one. Here are a couple of my favorites. 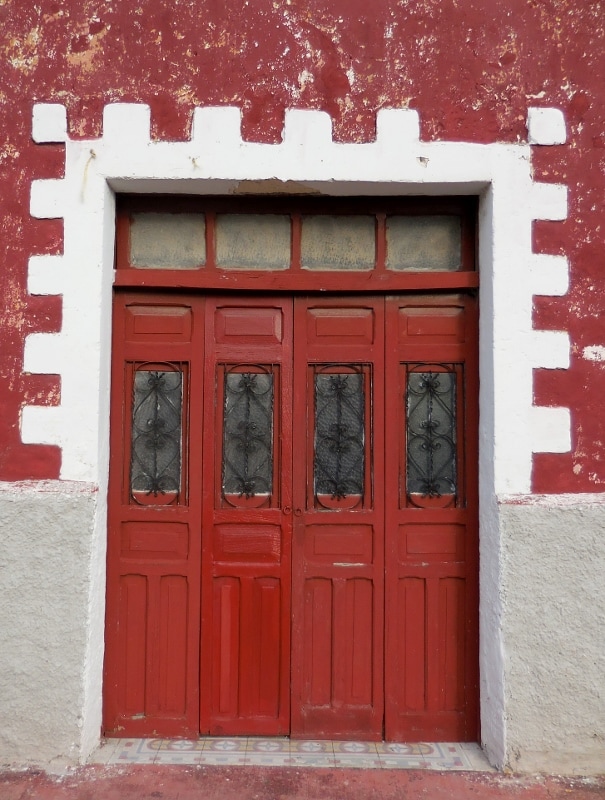 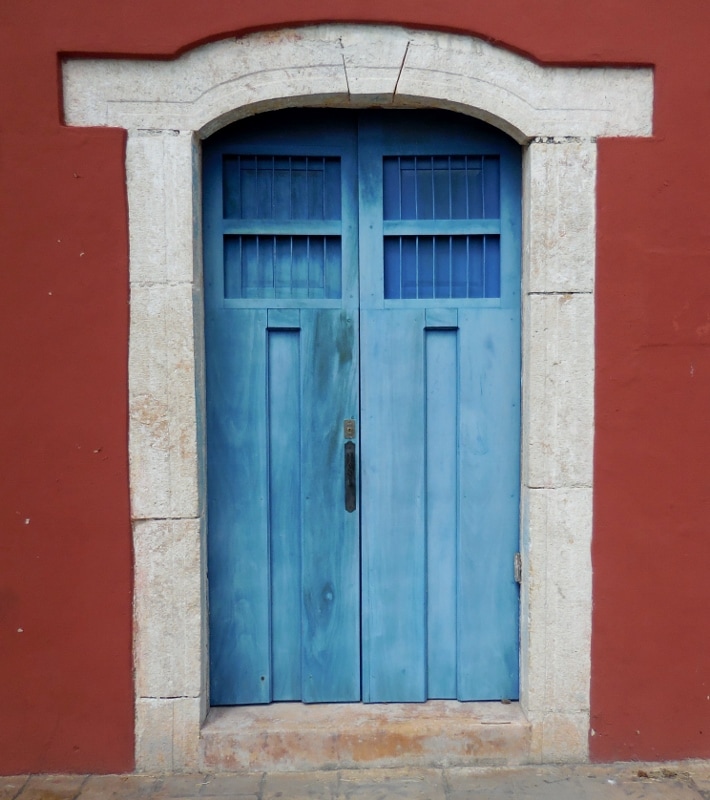 And I was enchanted by this beautiful pasta (also known as mosaico) tile floor in a vacant building I photographed through an open window, if you can imagine! I fell in love with these floors on our first trip to Merida in 2012 and found this great article online with much information about them. If my memory serves, I believe the building was either for rent or sale. Tempting.... 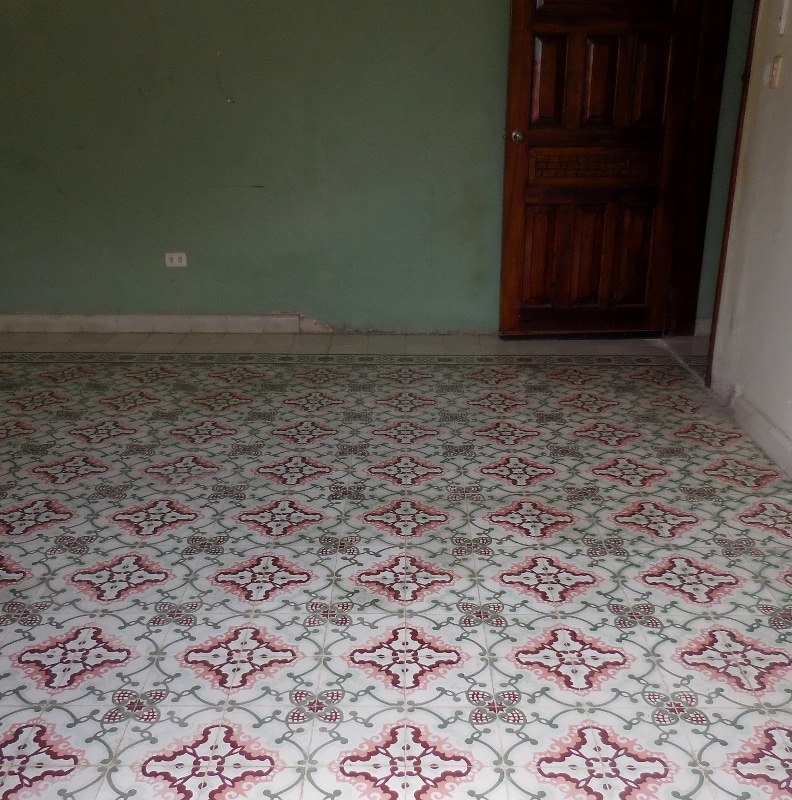 We saw quite a bit more in Valladolid, but this is enough for one post, so come on back in a few days for the third and final installment!
|
Emily & BarryWe're a long-married, early-retired couple who are currently traveling as nomads with no fixed home base. After years of living in North Carolina (Emily's home state), we spent 18 months living oceanfront on Ambergris Caye, Belize, a year road-tripping the US in a Honda CR-V, a year in Playa del Carmen, Mexico, and are now roaming North America in our 32' motorhome, Pearl, following warm weather whenever possible. 
Paisley, May 2016
States visited (pre-RV)
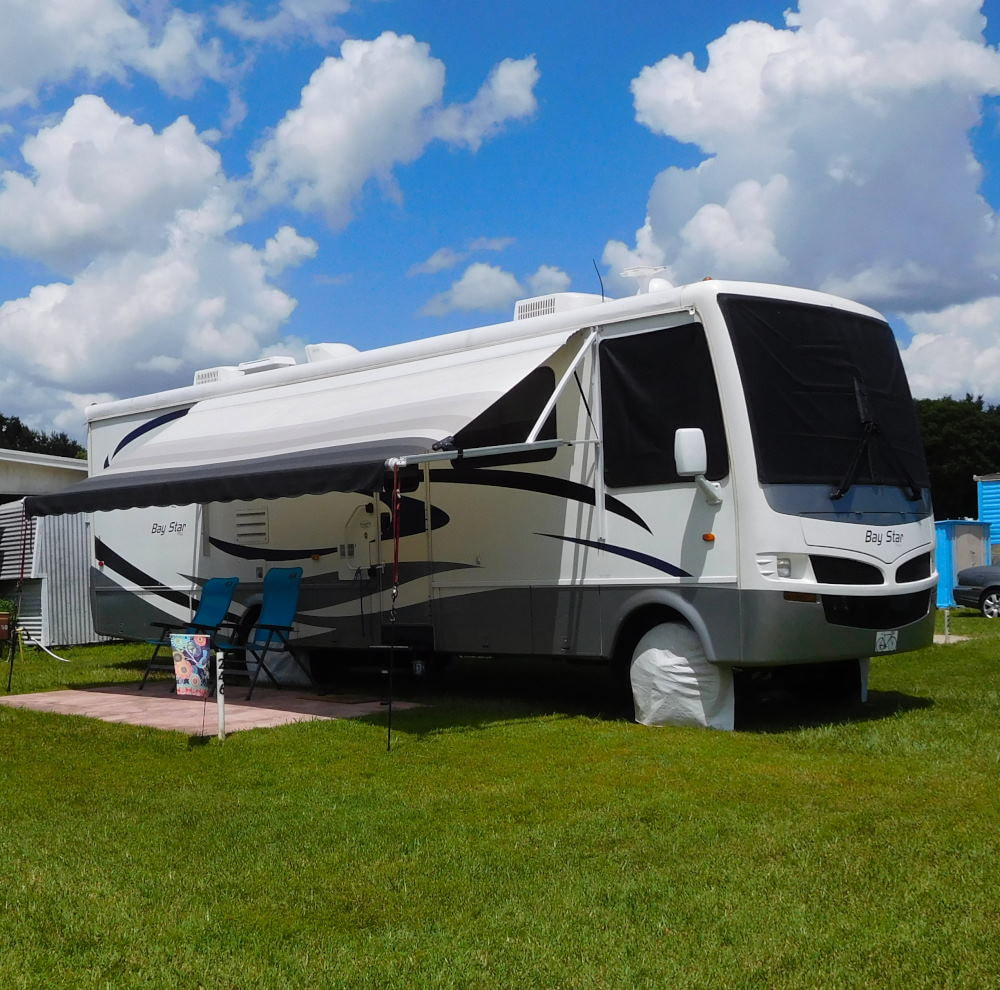
Pearl, a 2007 Newmar Bay Star
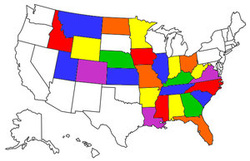
States visited in "Pearl"
Archives
July 2019
Favorite Travel Blogs |
 RSS Feed
